Hi,
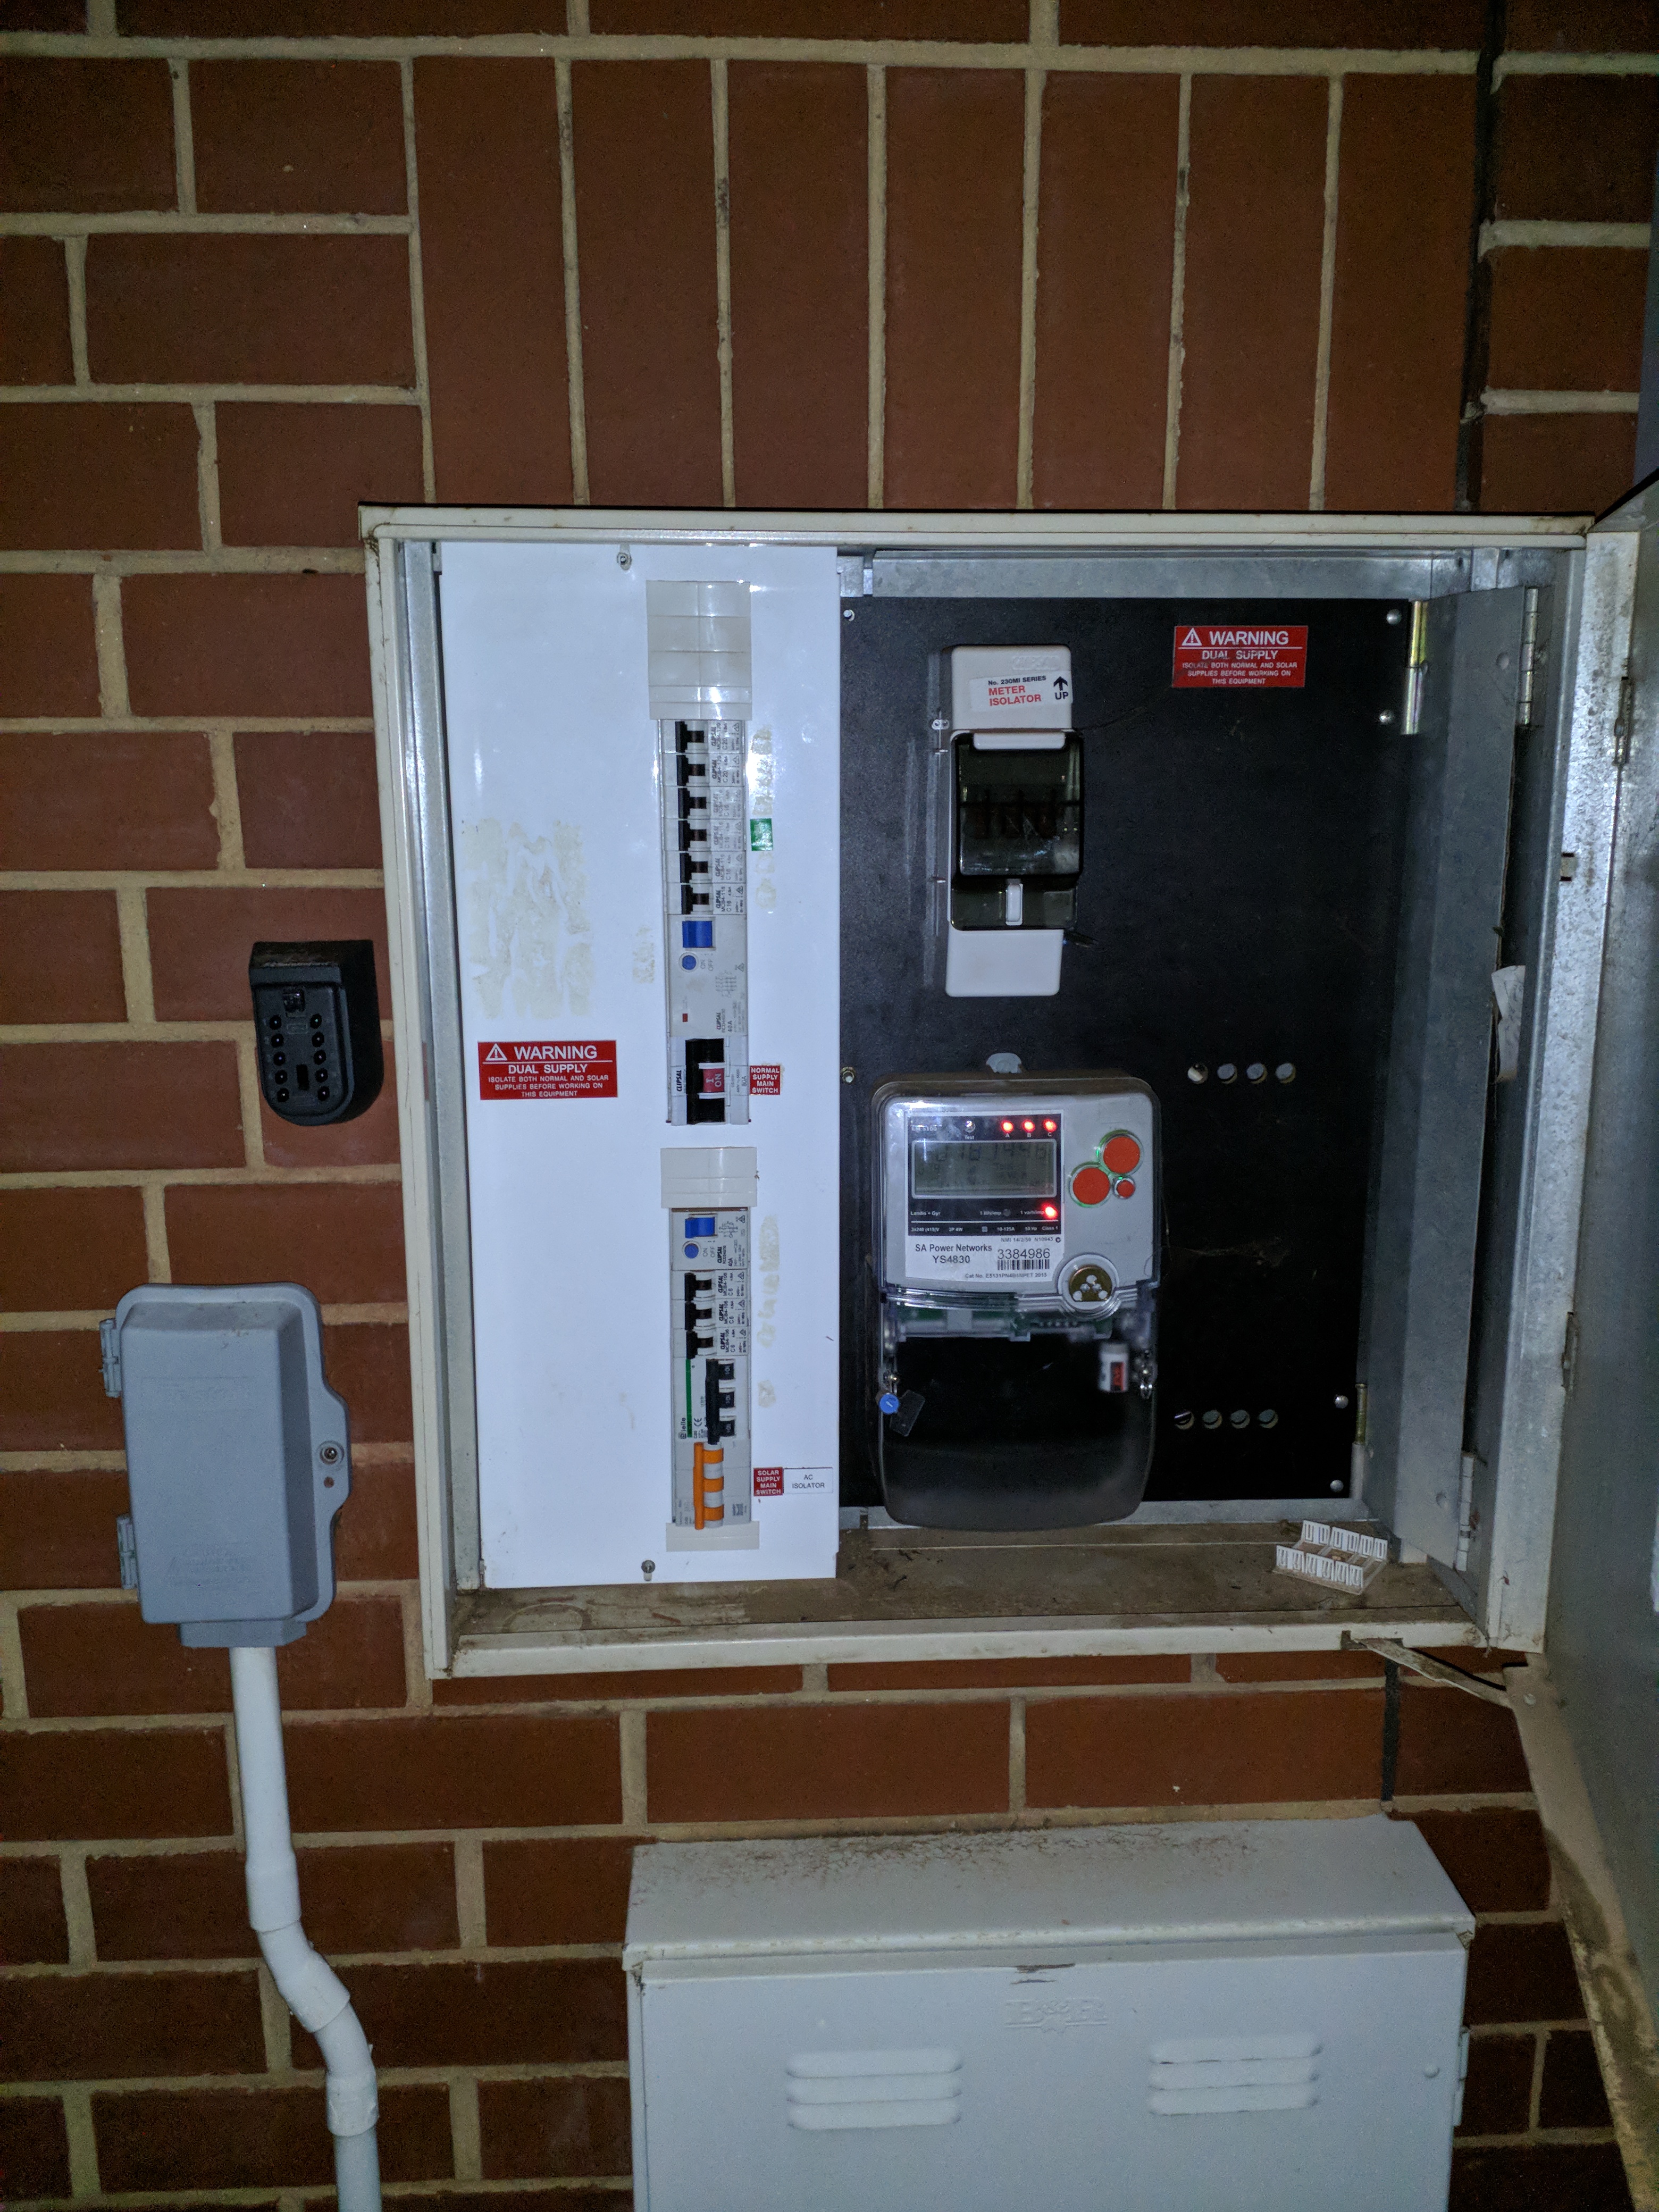
I’m going to get a electrician to modify my board so that I can use an IoTaWatt. I’m not 100% clear what I need to ask him to do. Below is picture of my board.
I want to use only the derived reference (per Three-phase Power — IoTaWatt 02_03_20 documentation), so I need to choose a phase and get two AC type sockets put in (1 for VT reference, 1 for a USB adapter to power the unit)? Is that all?
Sorry if this has been asked many times, but I did try searching!
It looks as if your board is outside. If so, you should consider some sort of weathertight enclosure with conduit to your wiring. It’s always a good idea to have the electrician install the CTs, and since you will have one there, I recommend you have them available for installation when the plugs are installed.
I live halfway around the world, so maybe one of your countrymen can offer better local advice.
Thanks for the response, yes the board is outside.
I was planning to just sit the IotaWatt somewhere in the board, is that not recommended?
If not recommended I still obviously get them to put in two sockets, but then also conduit to a weatherproof box? I guess it wouldn’t need to be a huge conduit, as all the wires are quite thin, and plug packs would live in the main meter board.
Most space on the board is ‘reserved’ for use by your network utility as part of local regulations and is not available to you to add your own devices.
Also putting a iotawatt in a fully enclosed earthed metal box will mean that you will get little to no wifi range.
I would get you electrician to:
Install a double GPO for the power supply and VT
Install plastic enclosure attached to main board with conduit
Install all CTs from the board to the iotawatt
Label the CT cords so you know what circuit each is attached to
While each CT/VT wire is small the size adds up when you have 16 of them.
The IotaWatt is pretty small - just make sure you have enough room for the 3.5mm jacks that connect on both sides and bottom of the device. I’d be thinking of putting the power adapters in the enclosure using a short extension lead and a double adapter / powerboard to connect to the GPO. Jaycar have a huge range of enclosures which should do. I don’t think heat buildup is a big problem but you might need a couple of vent holes drilled into the eventual “bottom” of the enclosure. Keep the spiders out with a bit of fly screen wire hot-glued over the holes.
Not sure which conduit to connect to board (Sparky will assist) but I’d ask for a length of “flex” just pushed, not glued, into the glands so you can “adjust” as required.