I currently live in an old house and I am trying to get to the bottom of my power usage. I’ve come to find out the power across the mains is grossly imbalanced and I have some inefficient electronics, etc which I am working on. The goal is to do what I can within reason to reduce my electrical consumption to properly size for an eventual solar system.
I’ve seen a few install pics and videos but nothing that showed a step by step so thought I would take few pics of my setup as I progress.
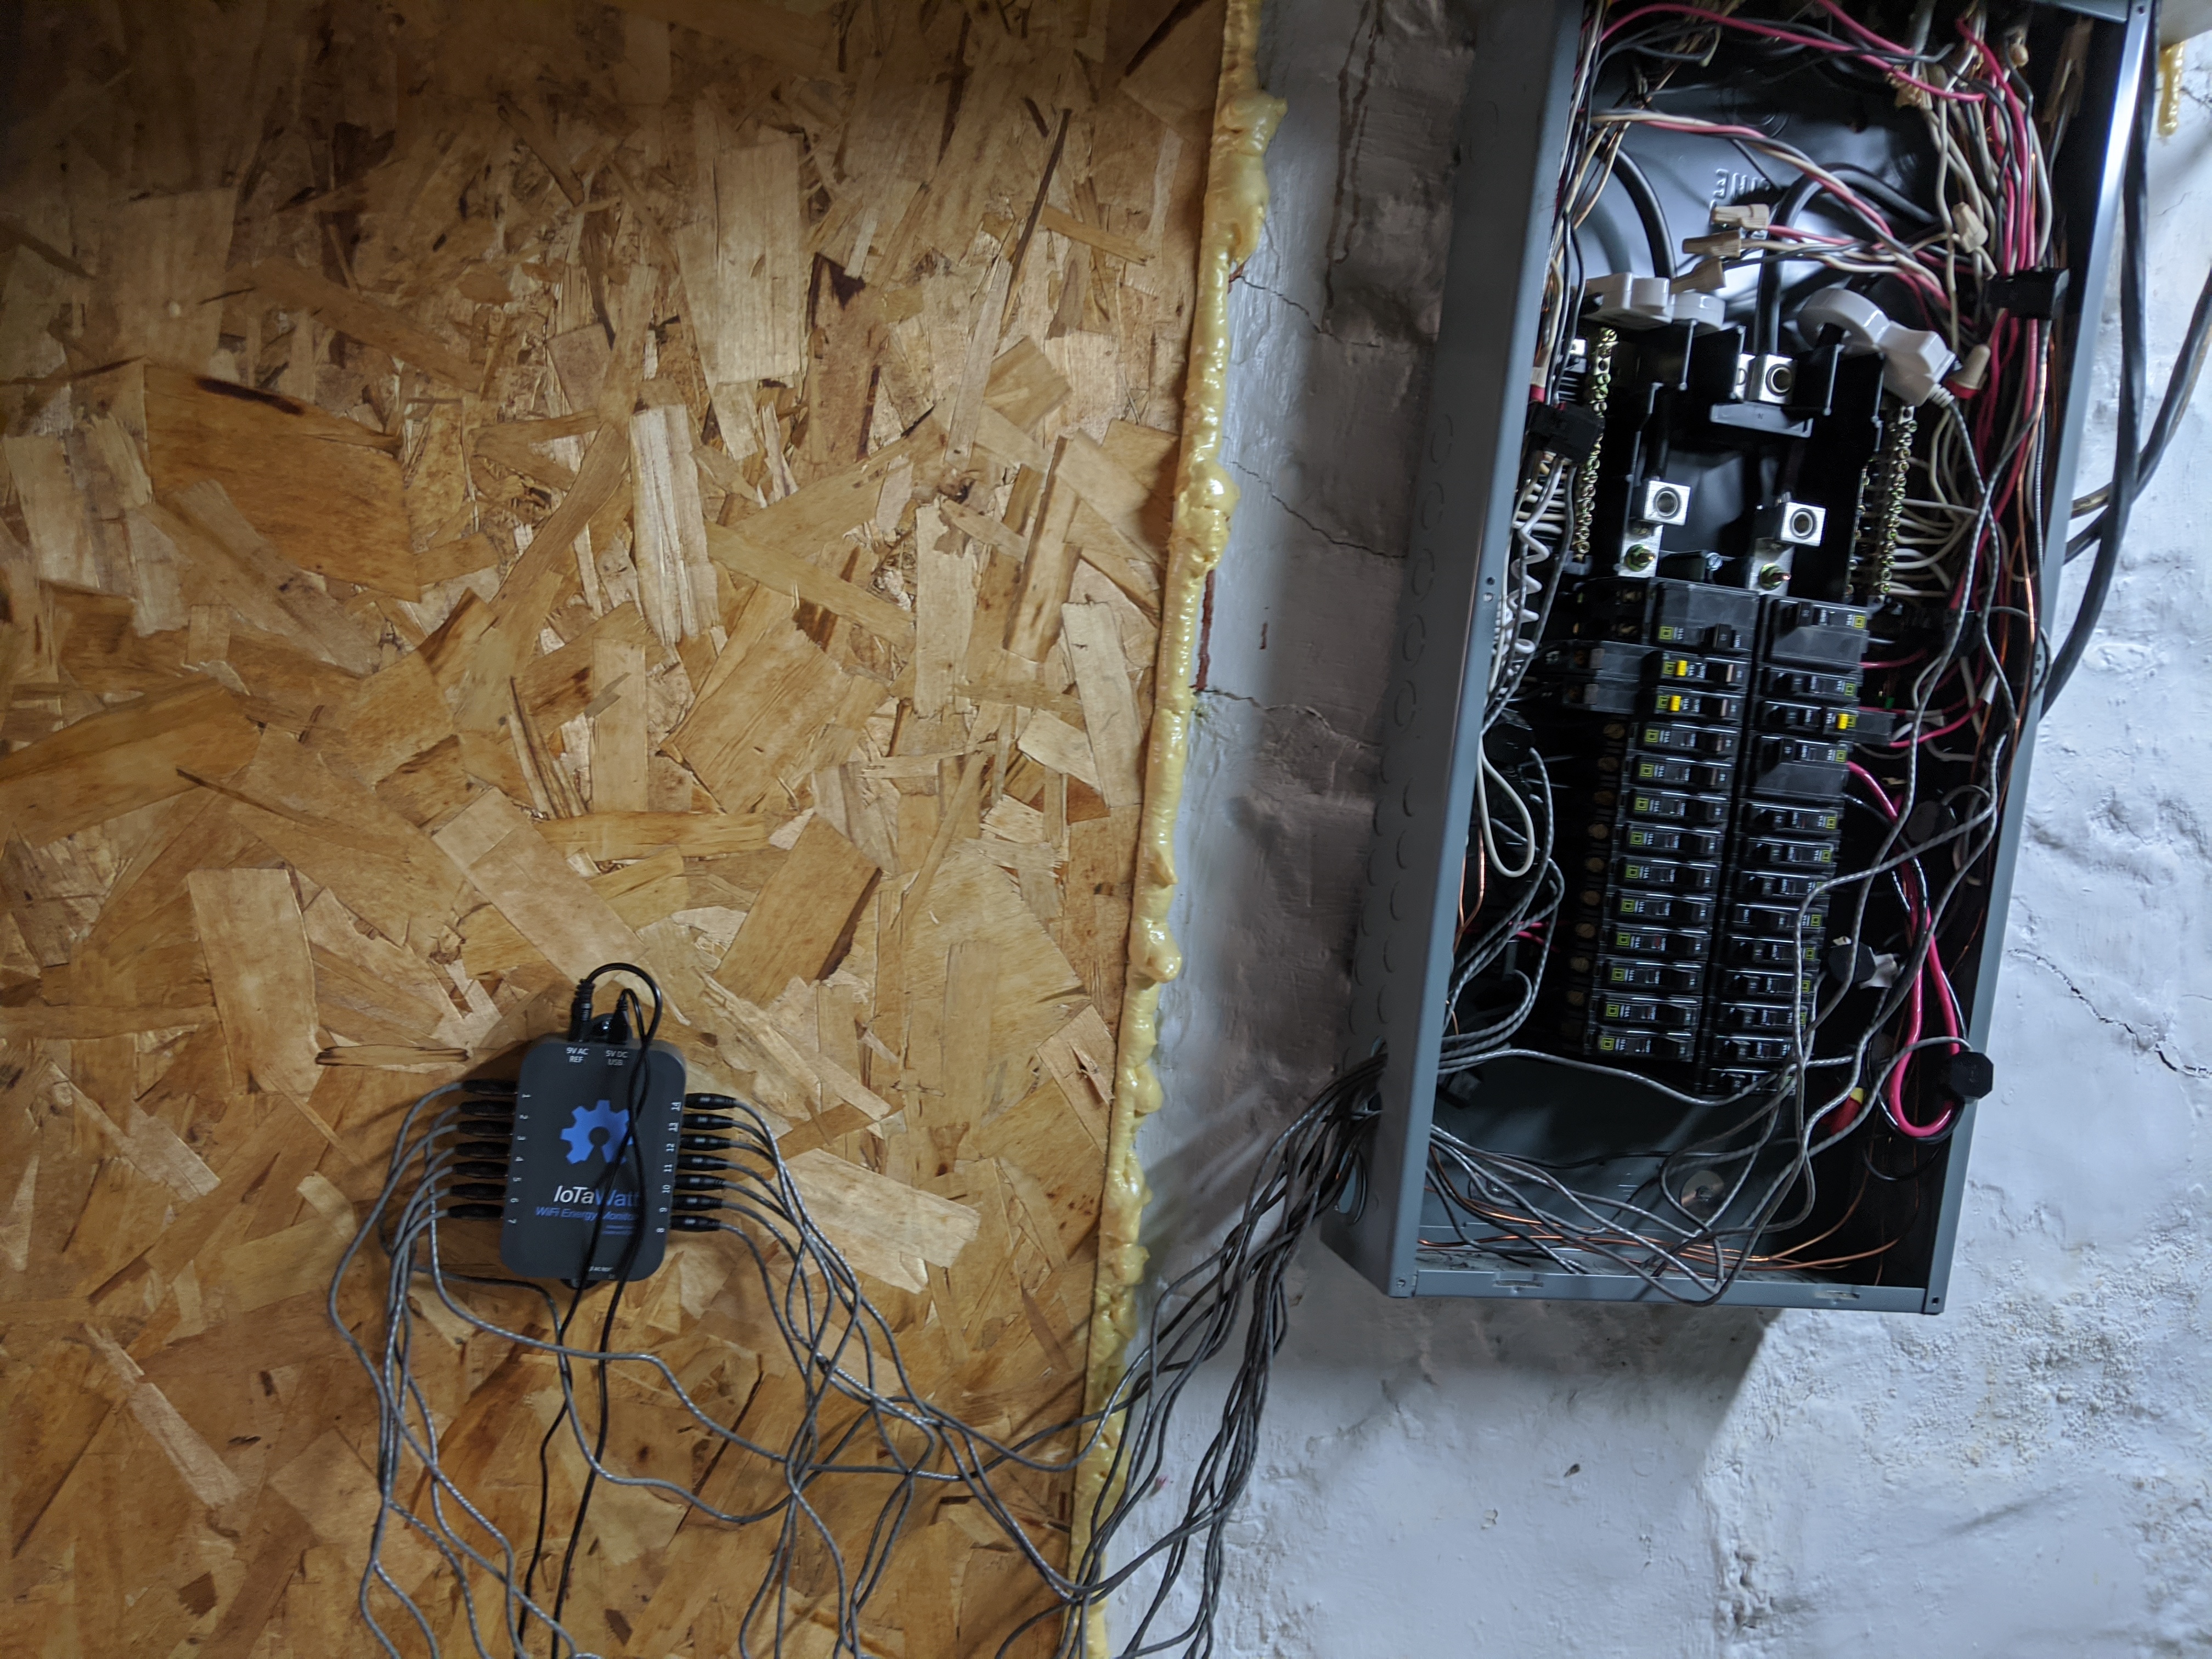
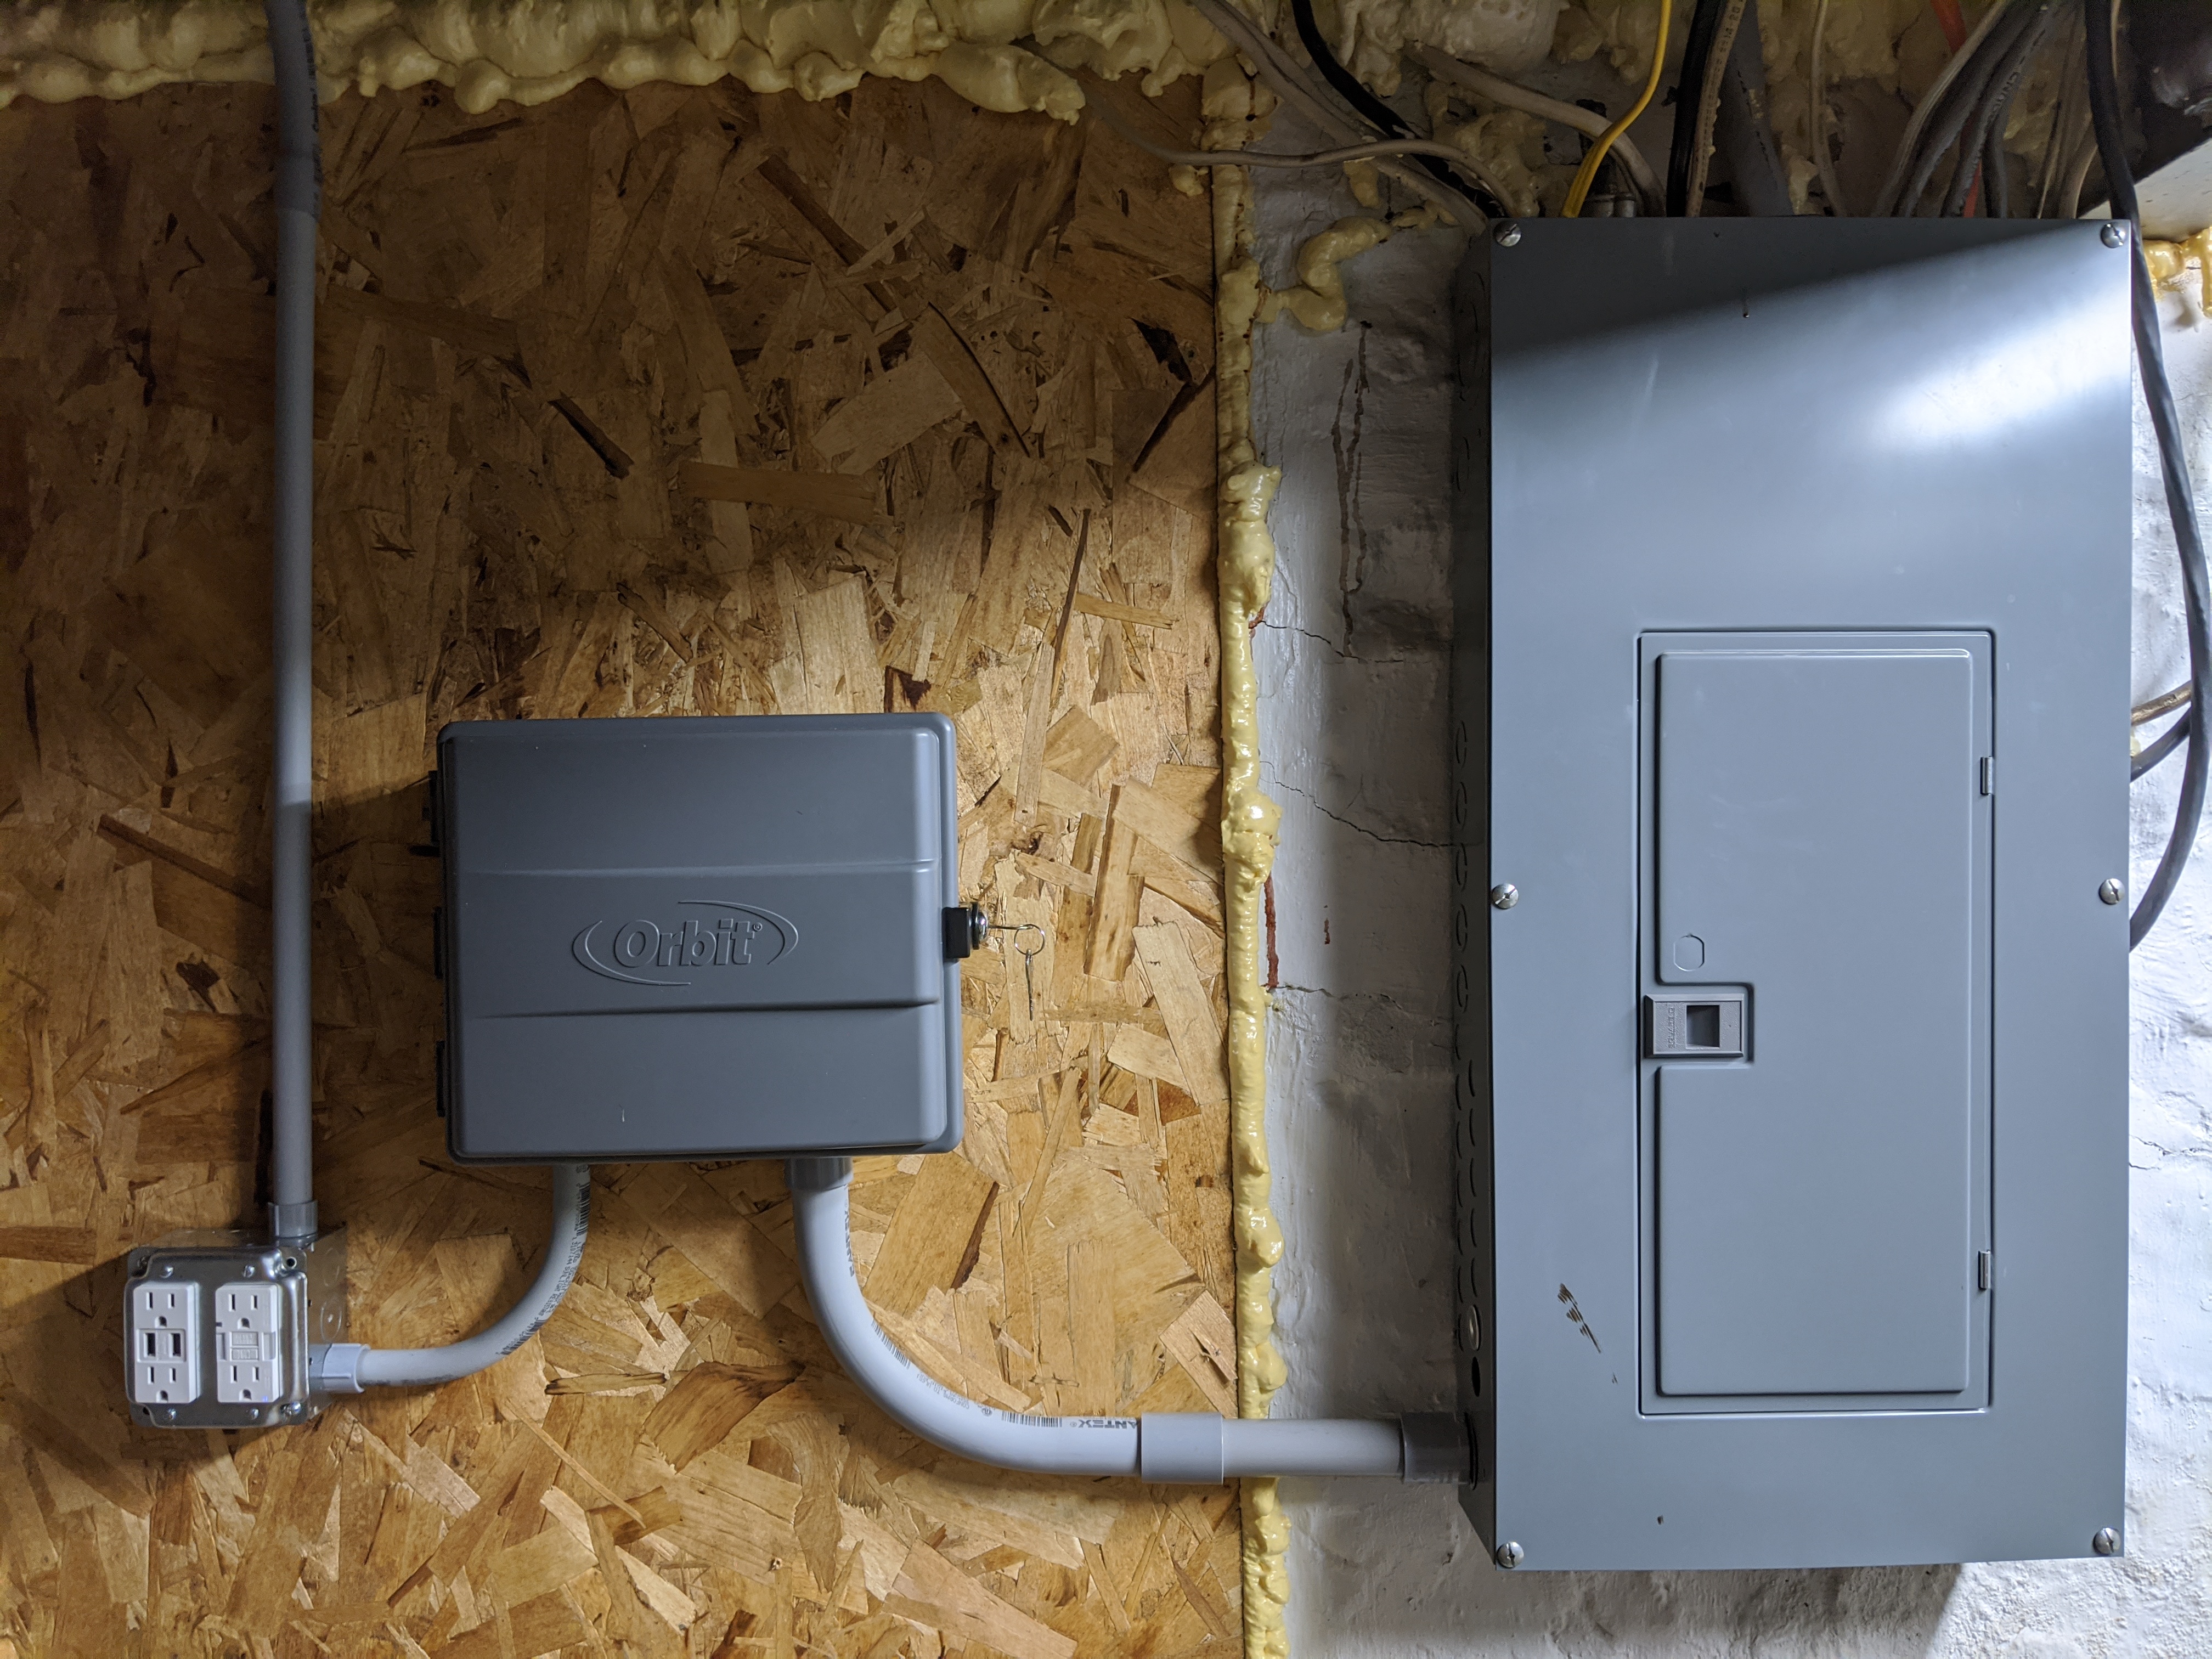
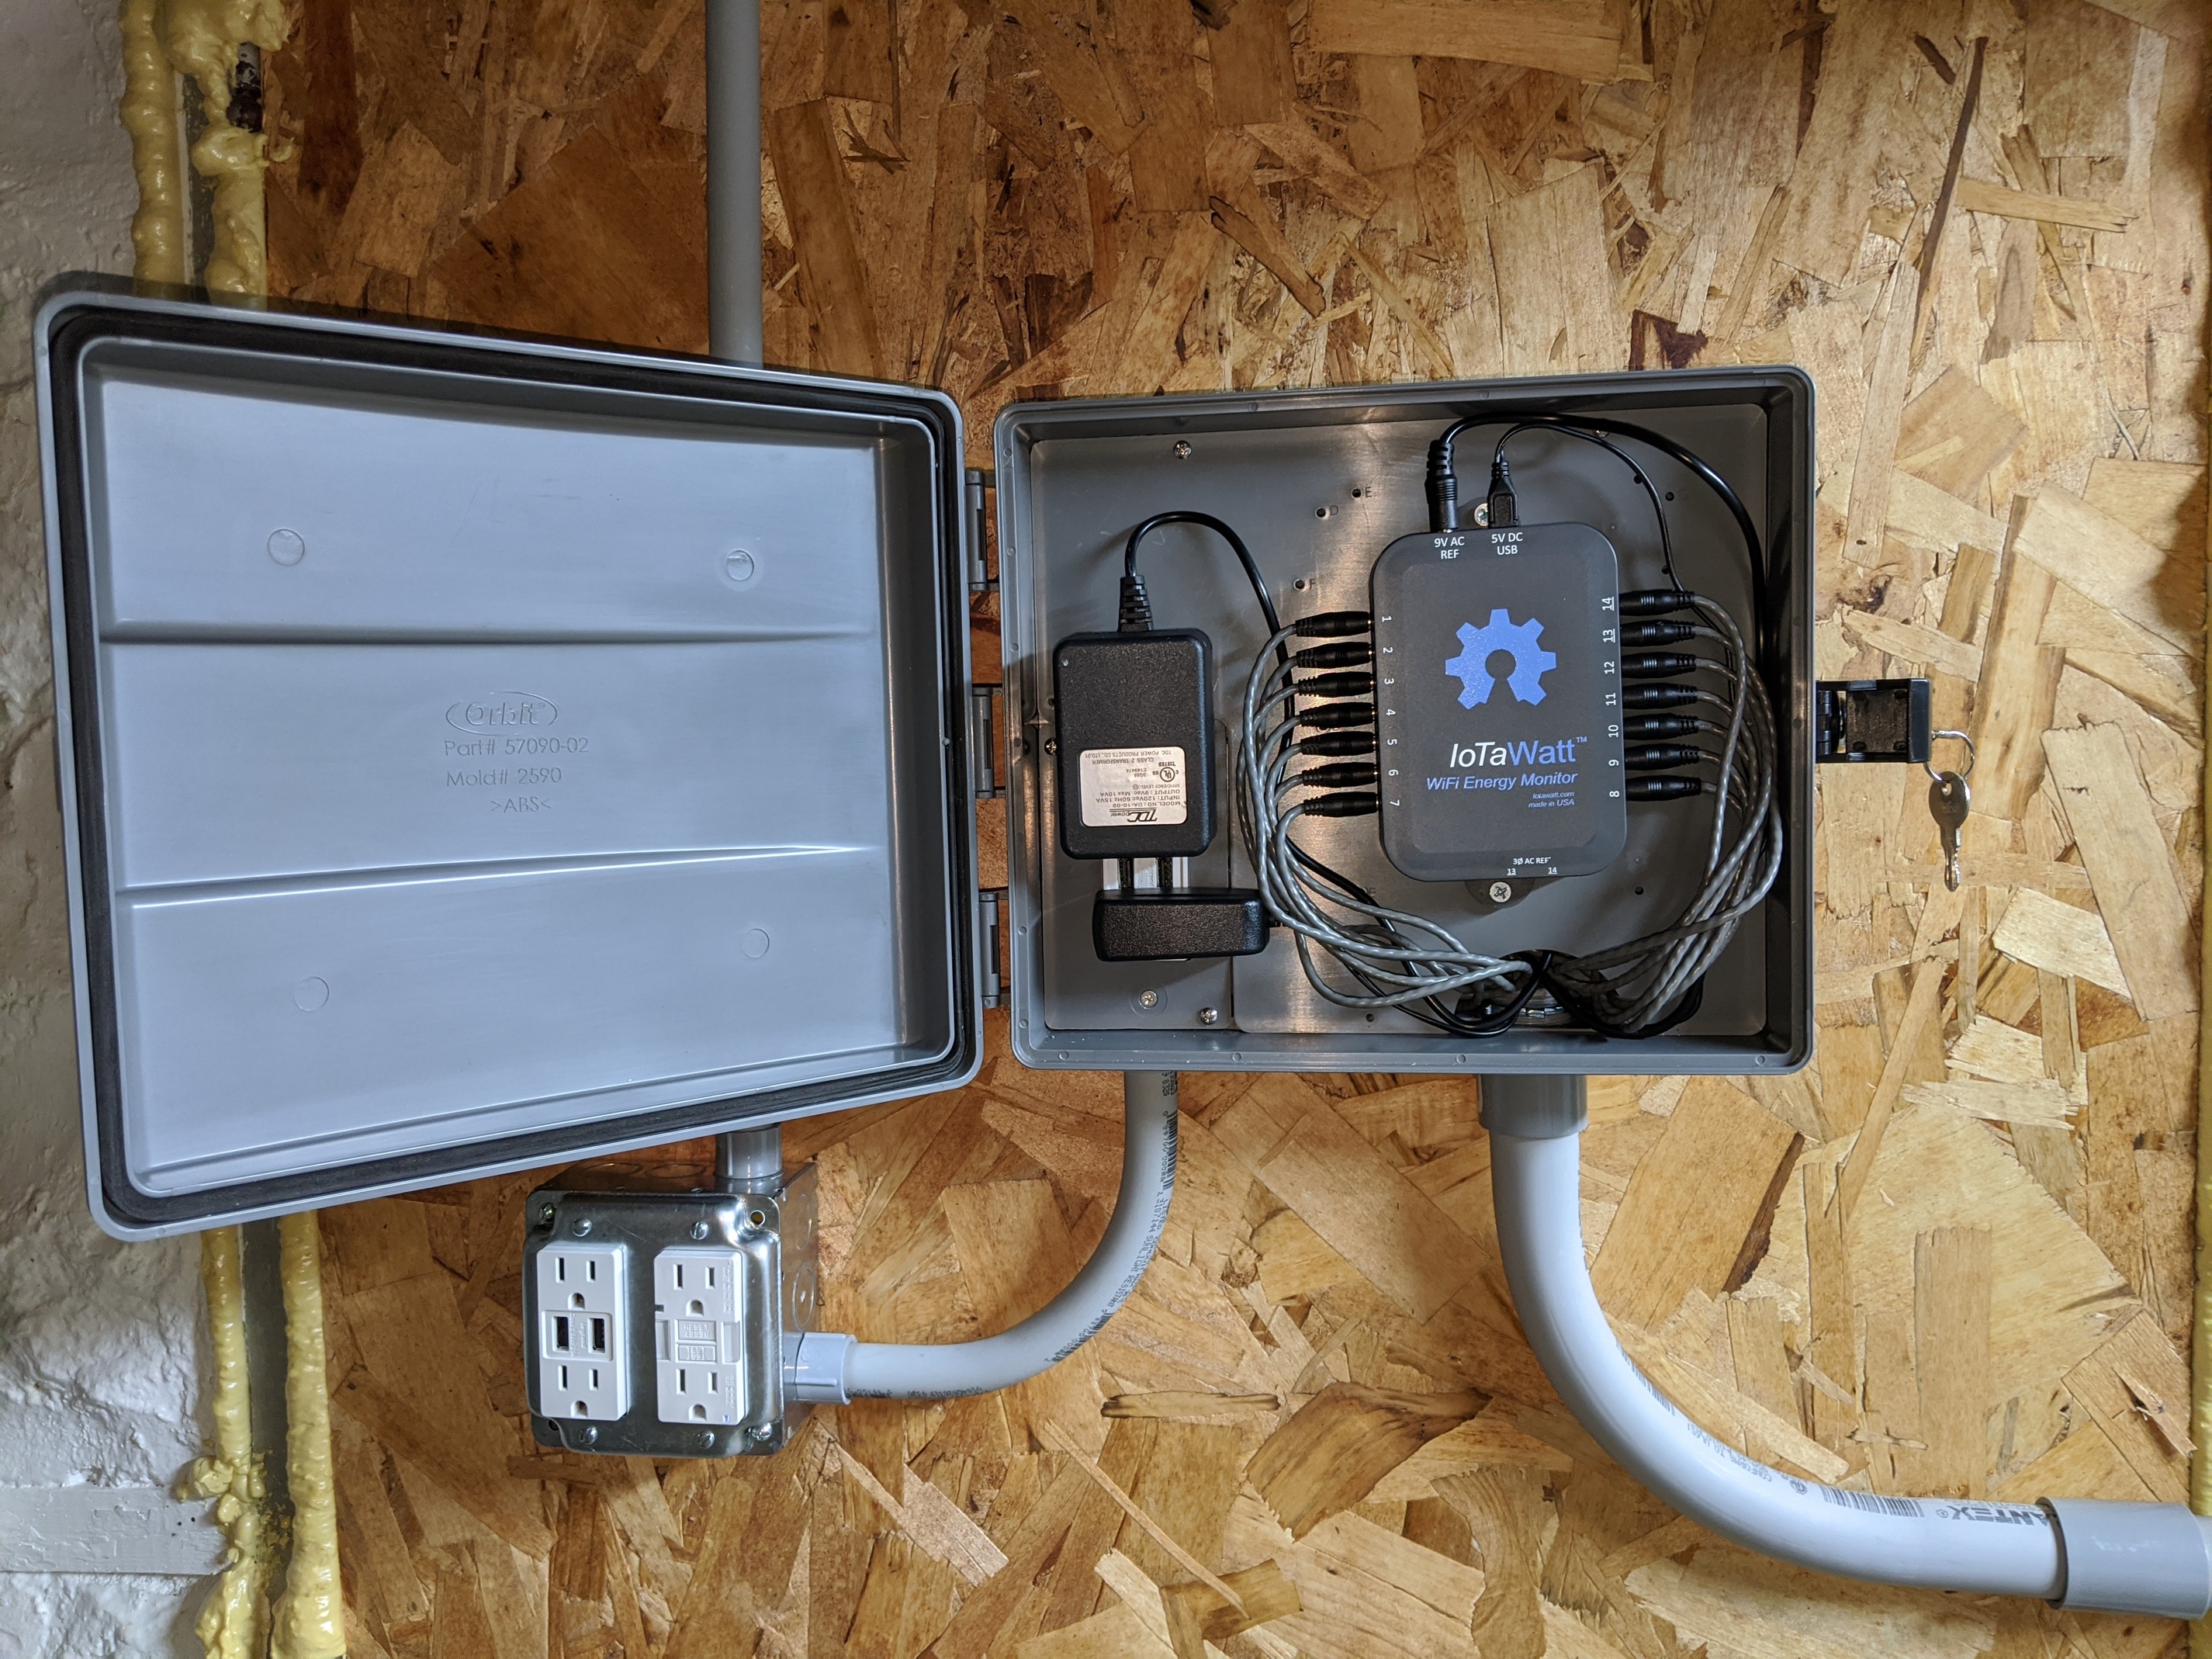
My main breaker is in the basement and I initially screwed the IotaWatt box directly to the left of the breaker box. After seeing a lot of clean installs I knew I wanted to tidy it up and not leave wires hanging everywhere.
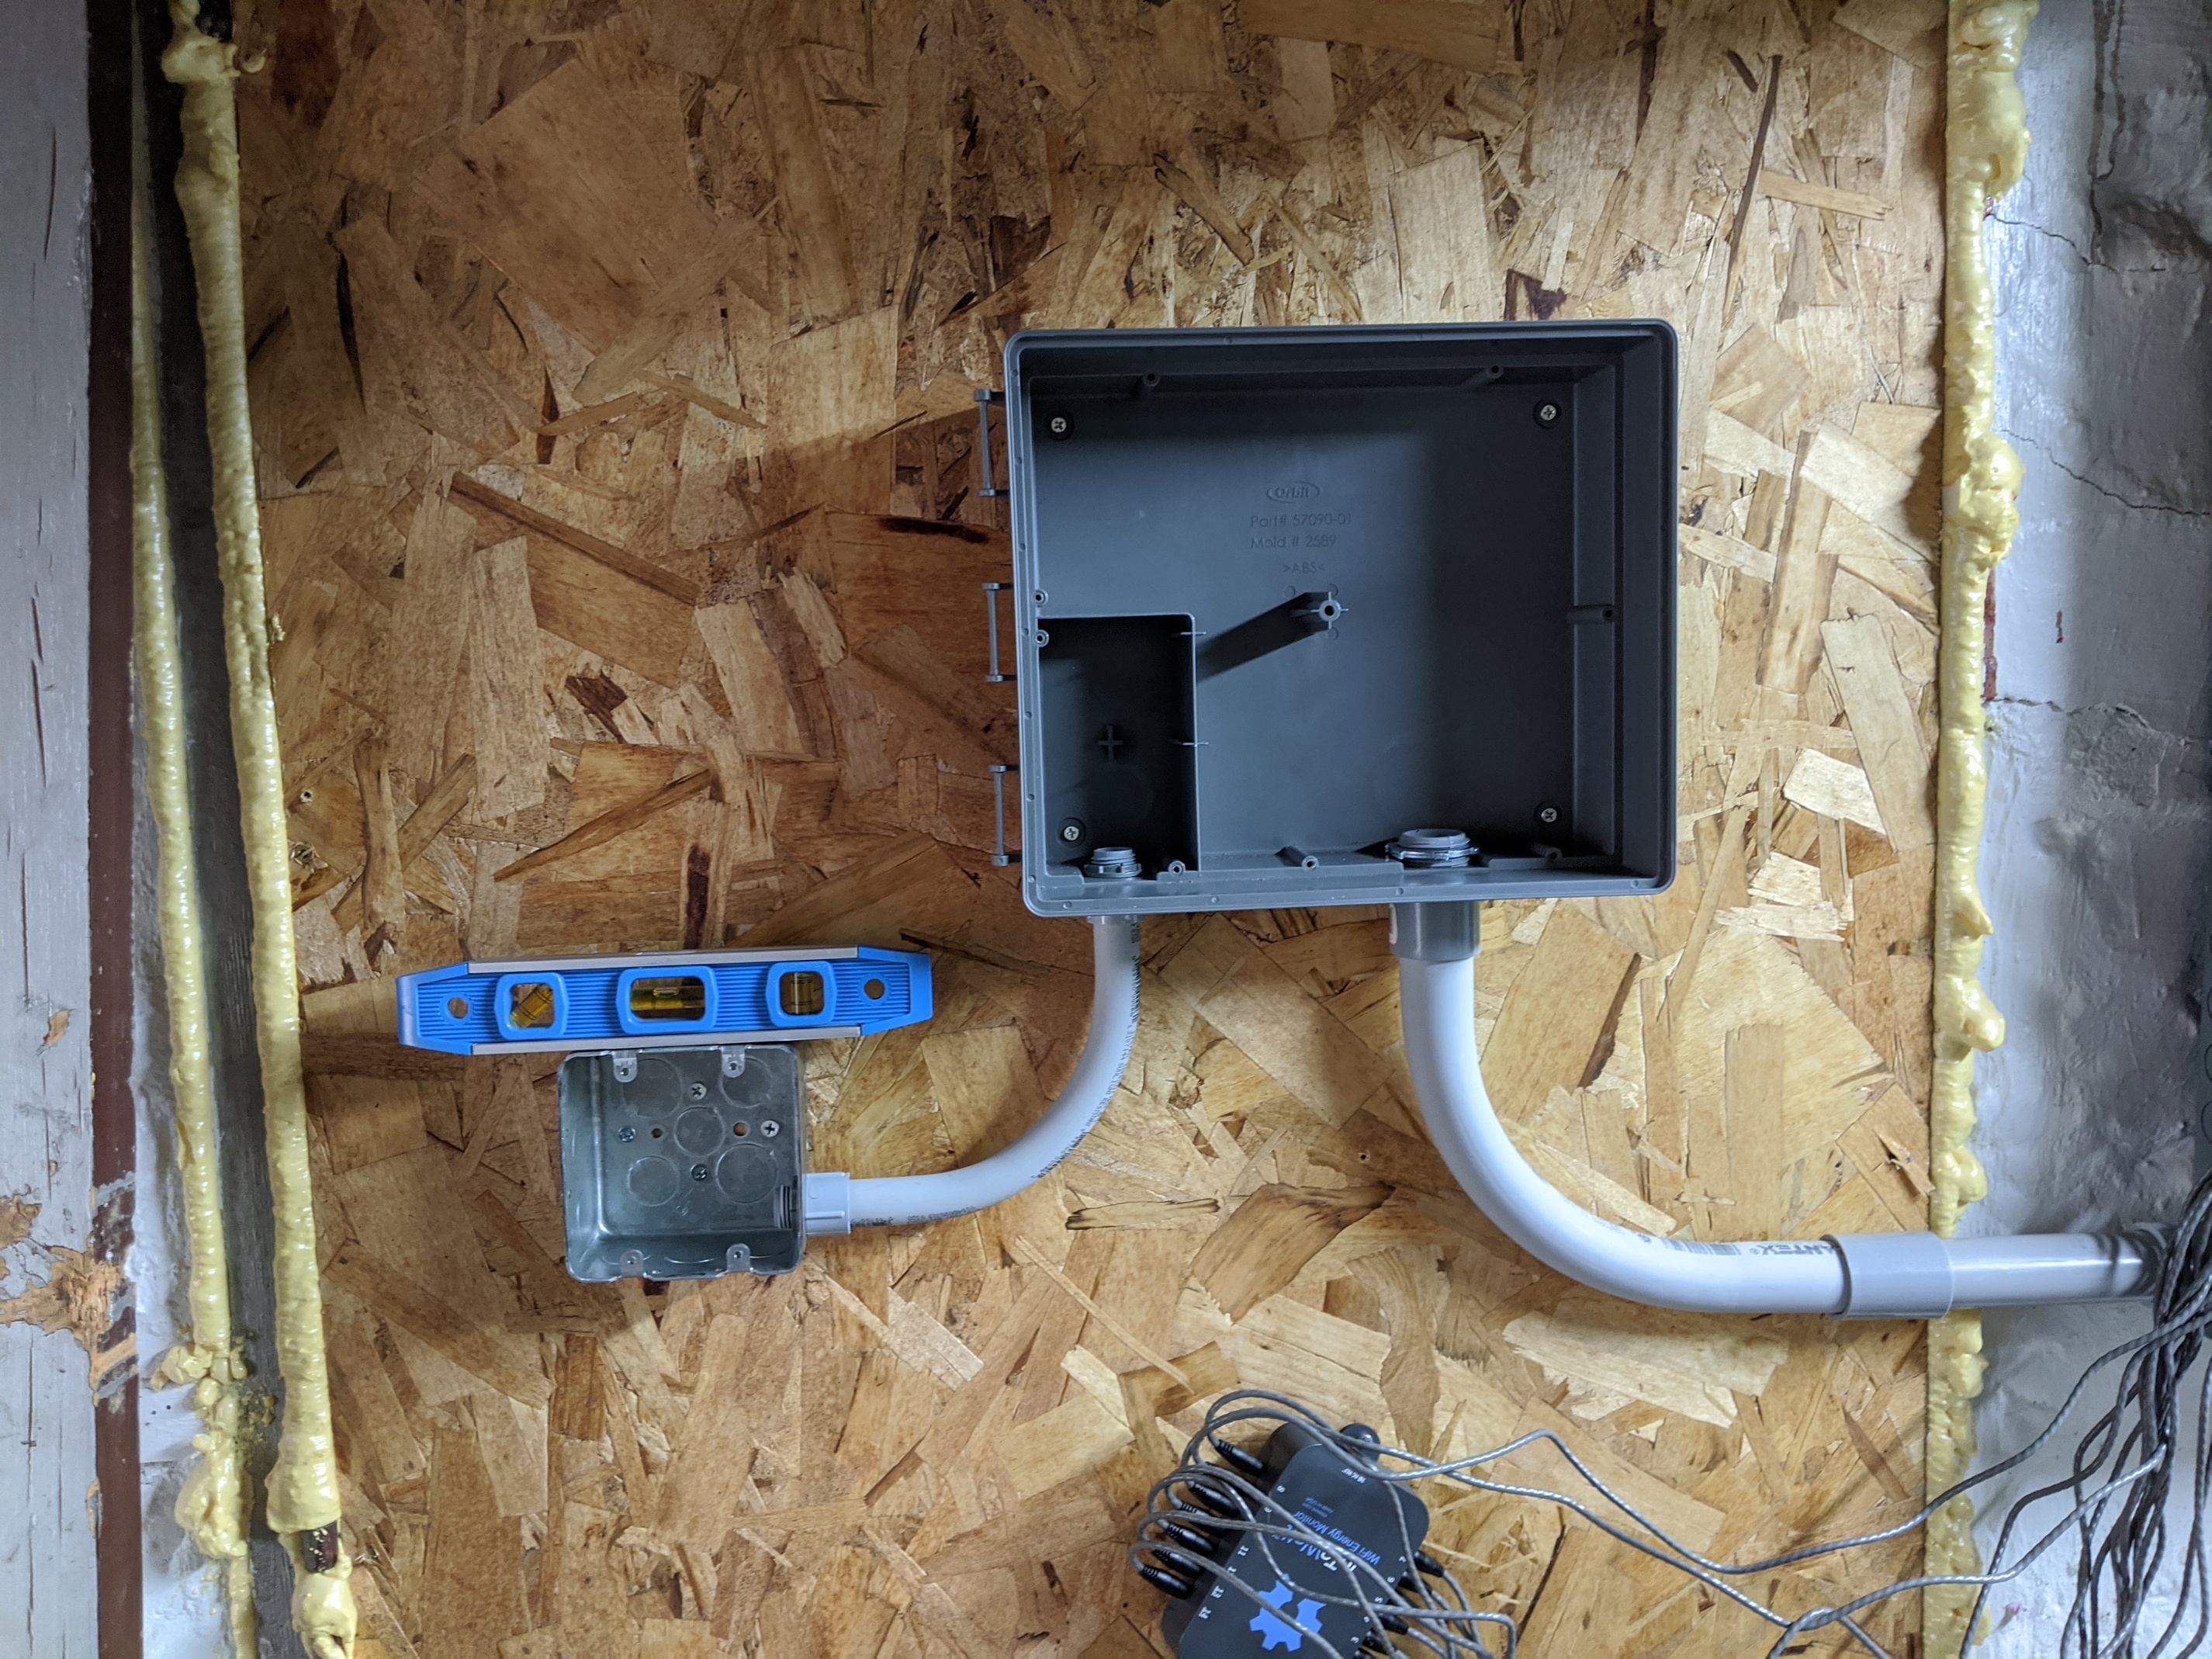
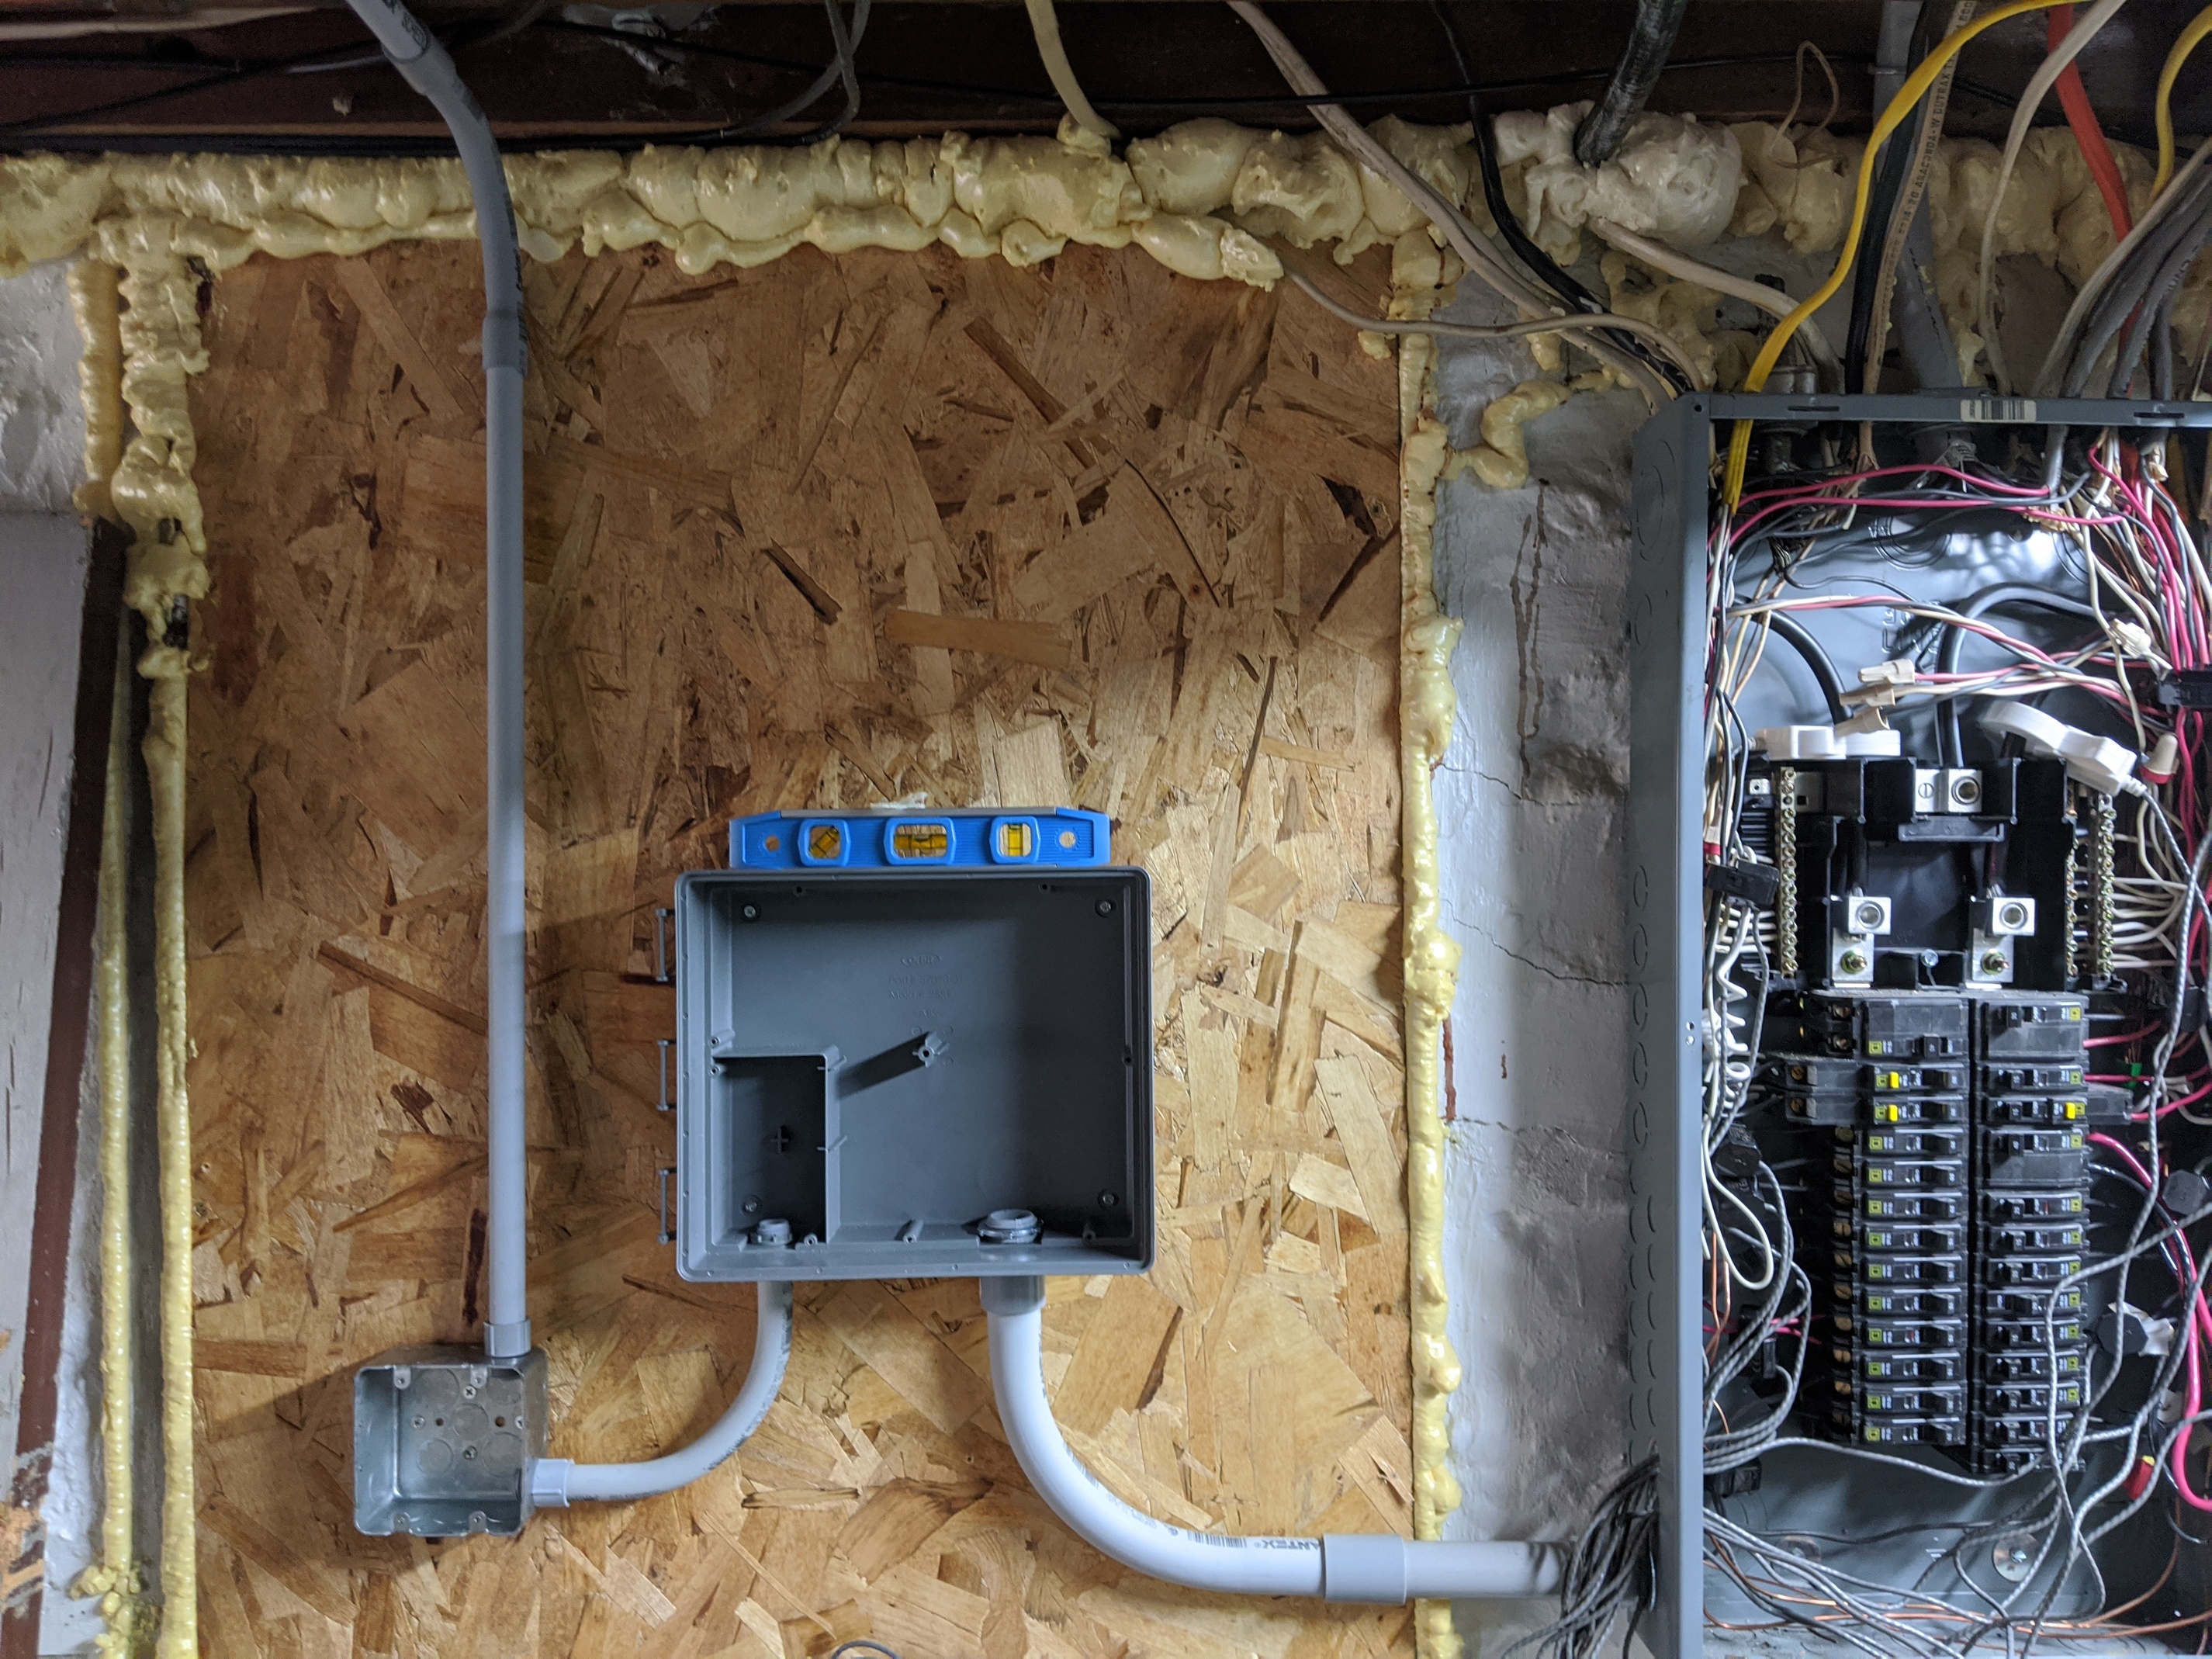
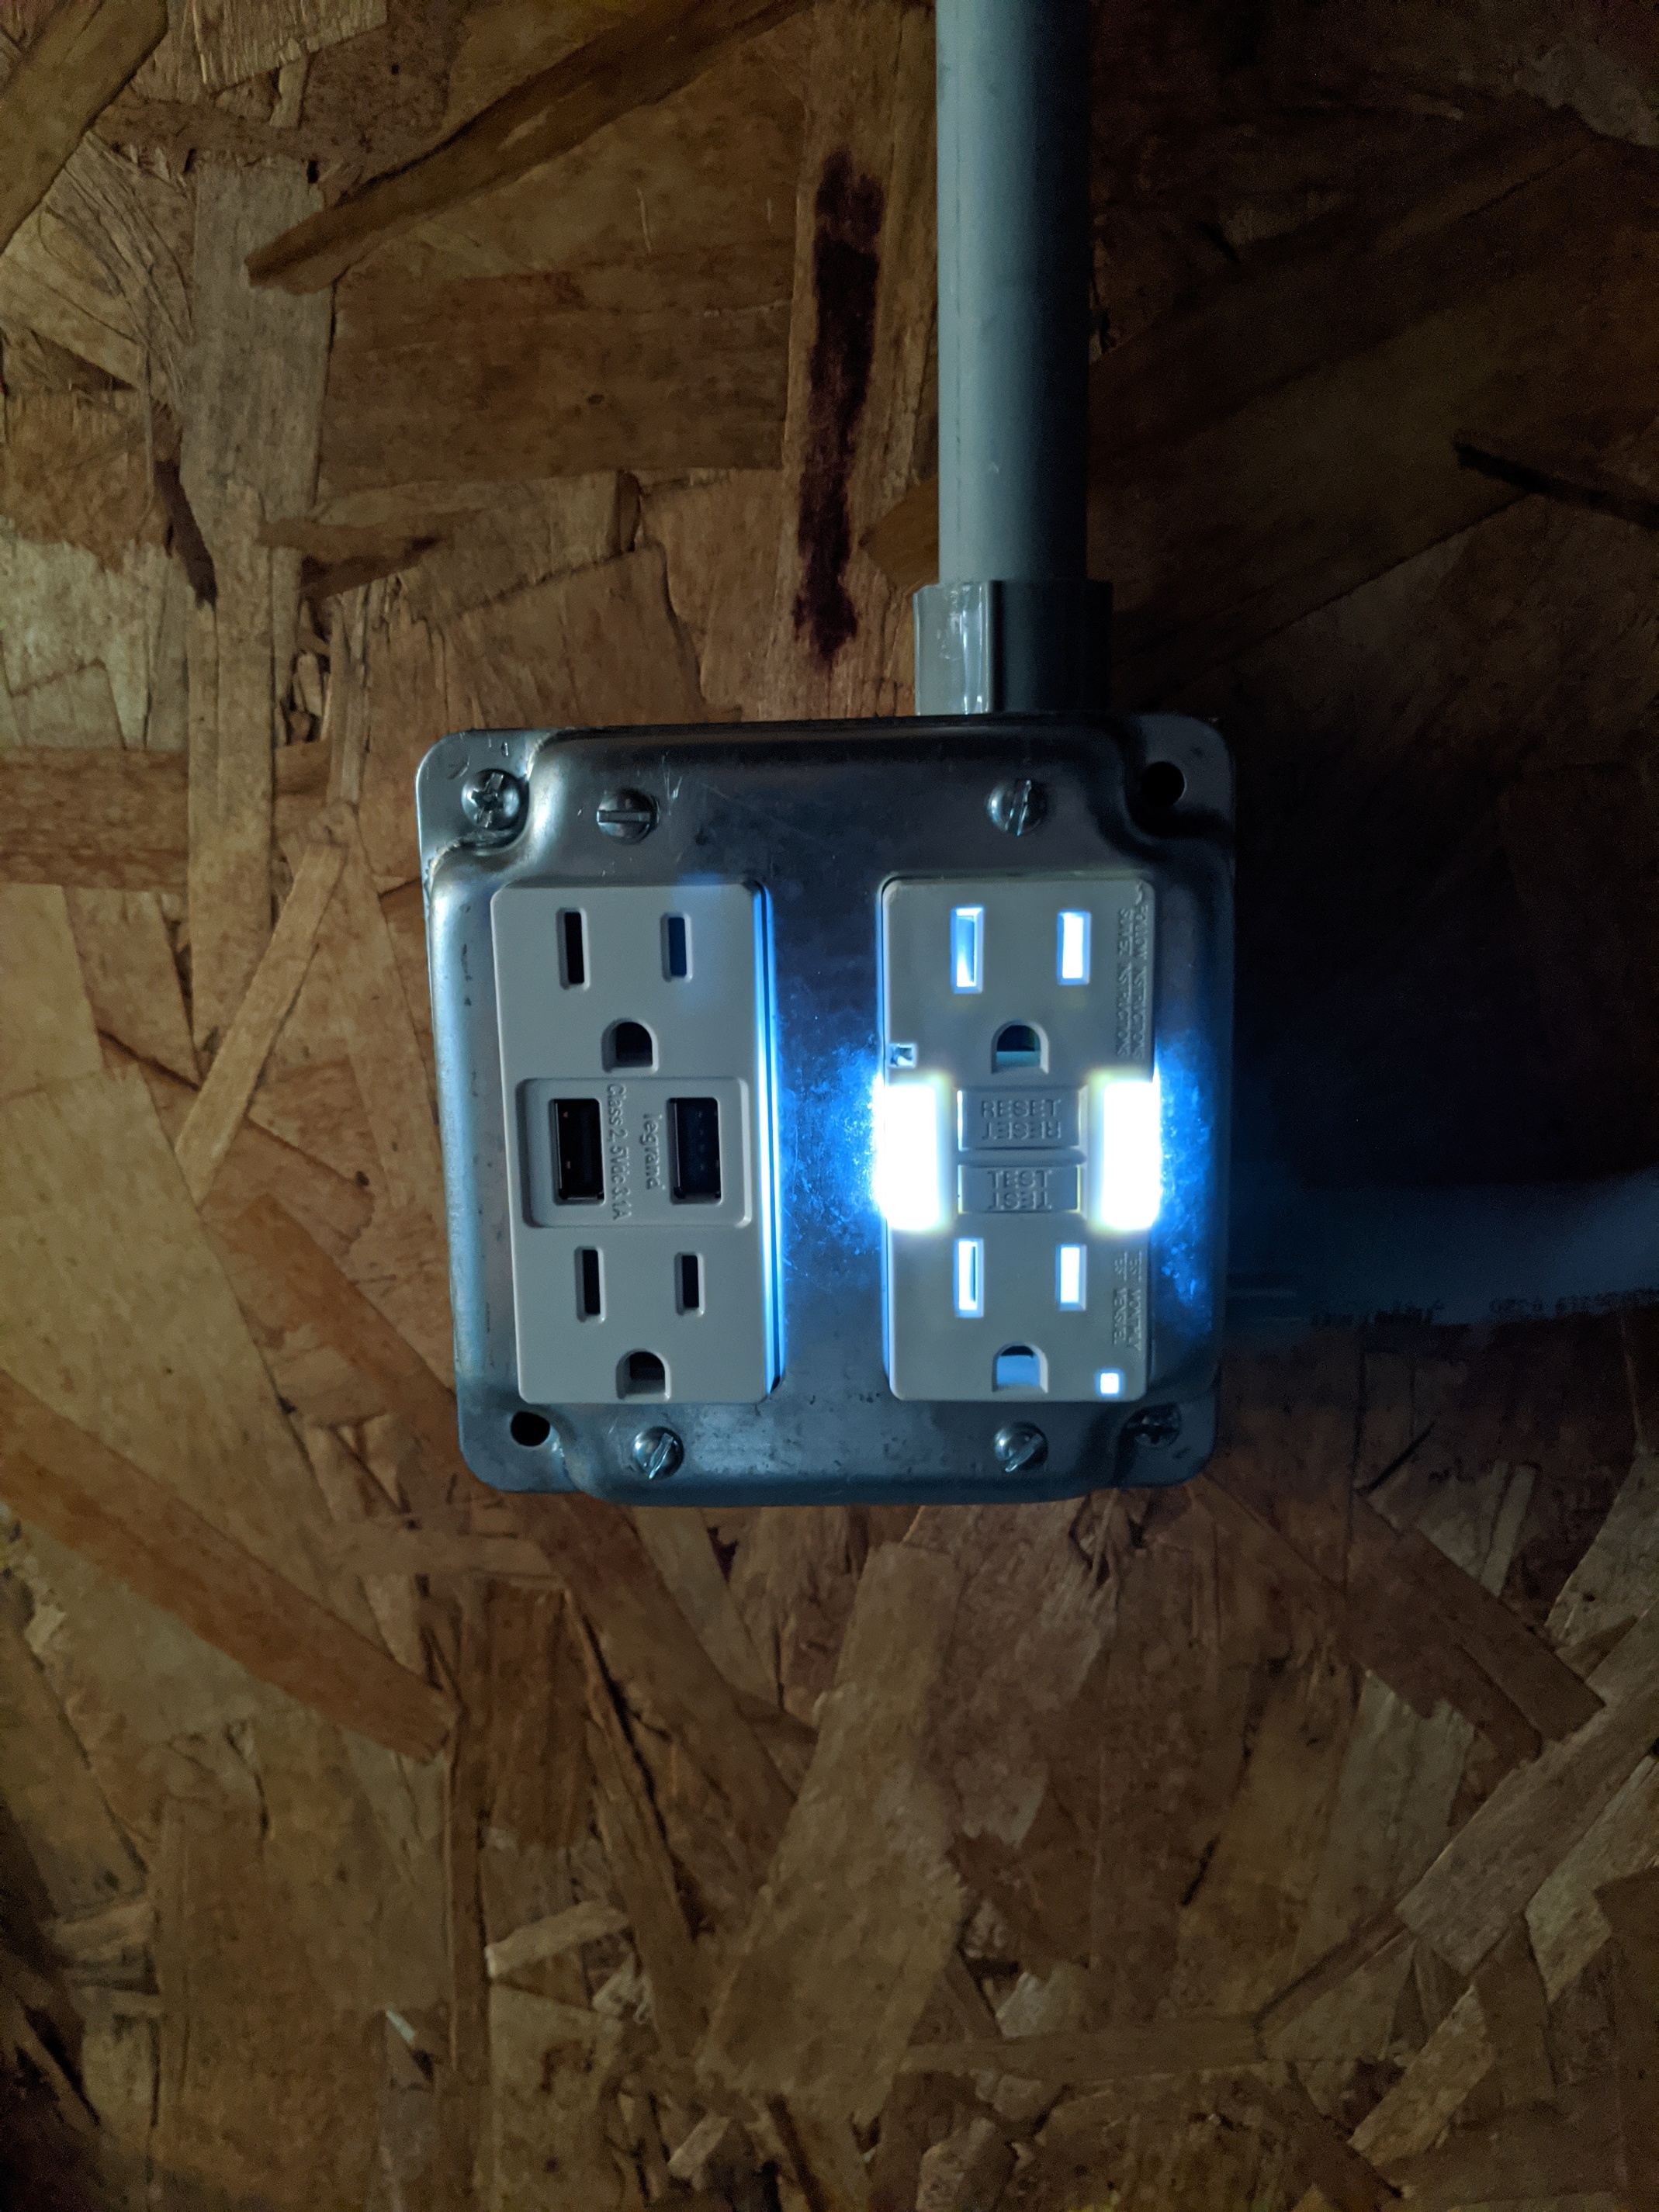
I like the clean install of the Orbit box. The original set up was an orange extension cable which was not going to work long term so I knew I had to add an outlet. I figured I might as well add a couple of extra outlets while I am going to all the work.
If anyone has questions let me know. I plan on digging into the software side maybe in the next few months, but for now I’m pretty satisfied. I also need to look into load balancing the breaker box. Some of the CT’s may need to be re positioned - specifically the HVAC / Furnace.
For now I’m pretty happy with this set up.
Edit: forgot to mention that I used a 1" Schedule 40 PVC for the CT lines. I had to use a dremel to open up the Orbit box hole a bit. Same thing on the other hole for the 120V power but I used 3/4" .
Ha! I’d take a mess of wires if I was smart enough to set up a sweet dashboard like you have via EmonCMS on RaspberryPi. Last May I picked up a CanaKit Raspberry Pi 3 B+ to run Home Assistant which I could never get running properly so I gave up and switched to SmartThings. So, not too optimistic I have the chops to get EmonCMS up and running.
Maybe if there was a step by step for 6 yr olds I could get it working
Thanks for the kind words and maybe between the two of us we could take the show on the road.
If you follow the directions on the EmonCMS site for Raspberry Pi installs, it is rather easy to get it up and running. Updating is a bit more of a pain, but it has gone smoothly for me each time. Happy to assist or provide any help I can if you decide to give it another go. For me, Emon is my system of choice as my live dashboard while I’m home. I love the integration and how easy PVOutput is as well. That is my system of choice while I’m away. Just gives me that quick idea of usage, etc.
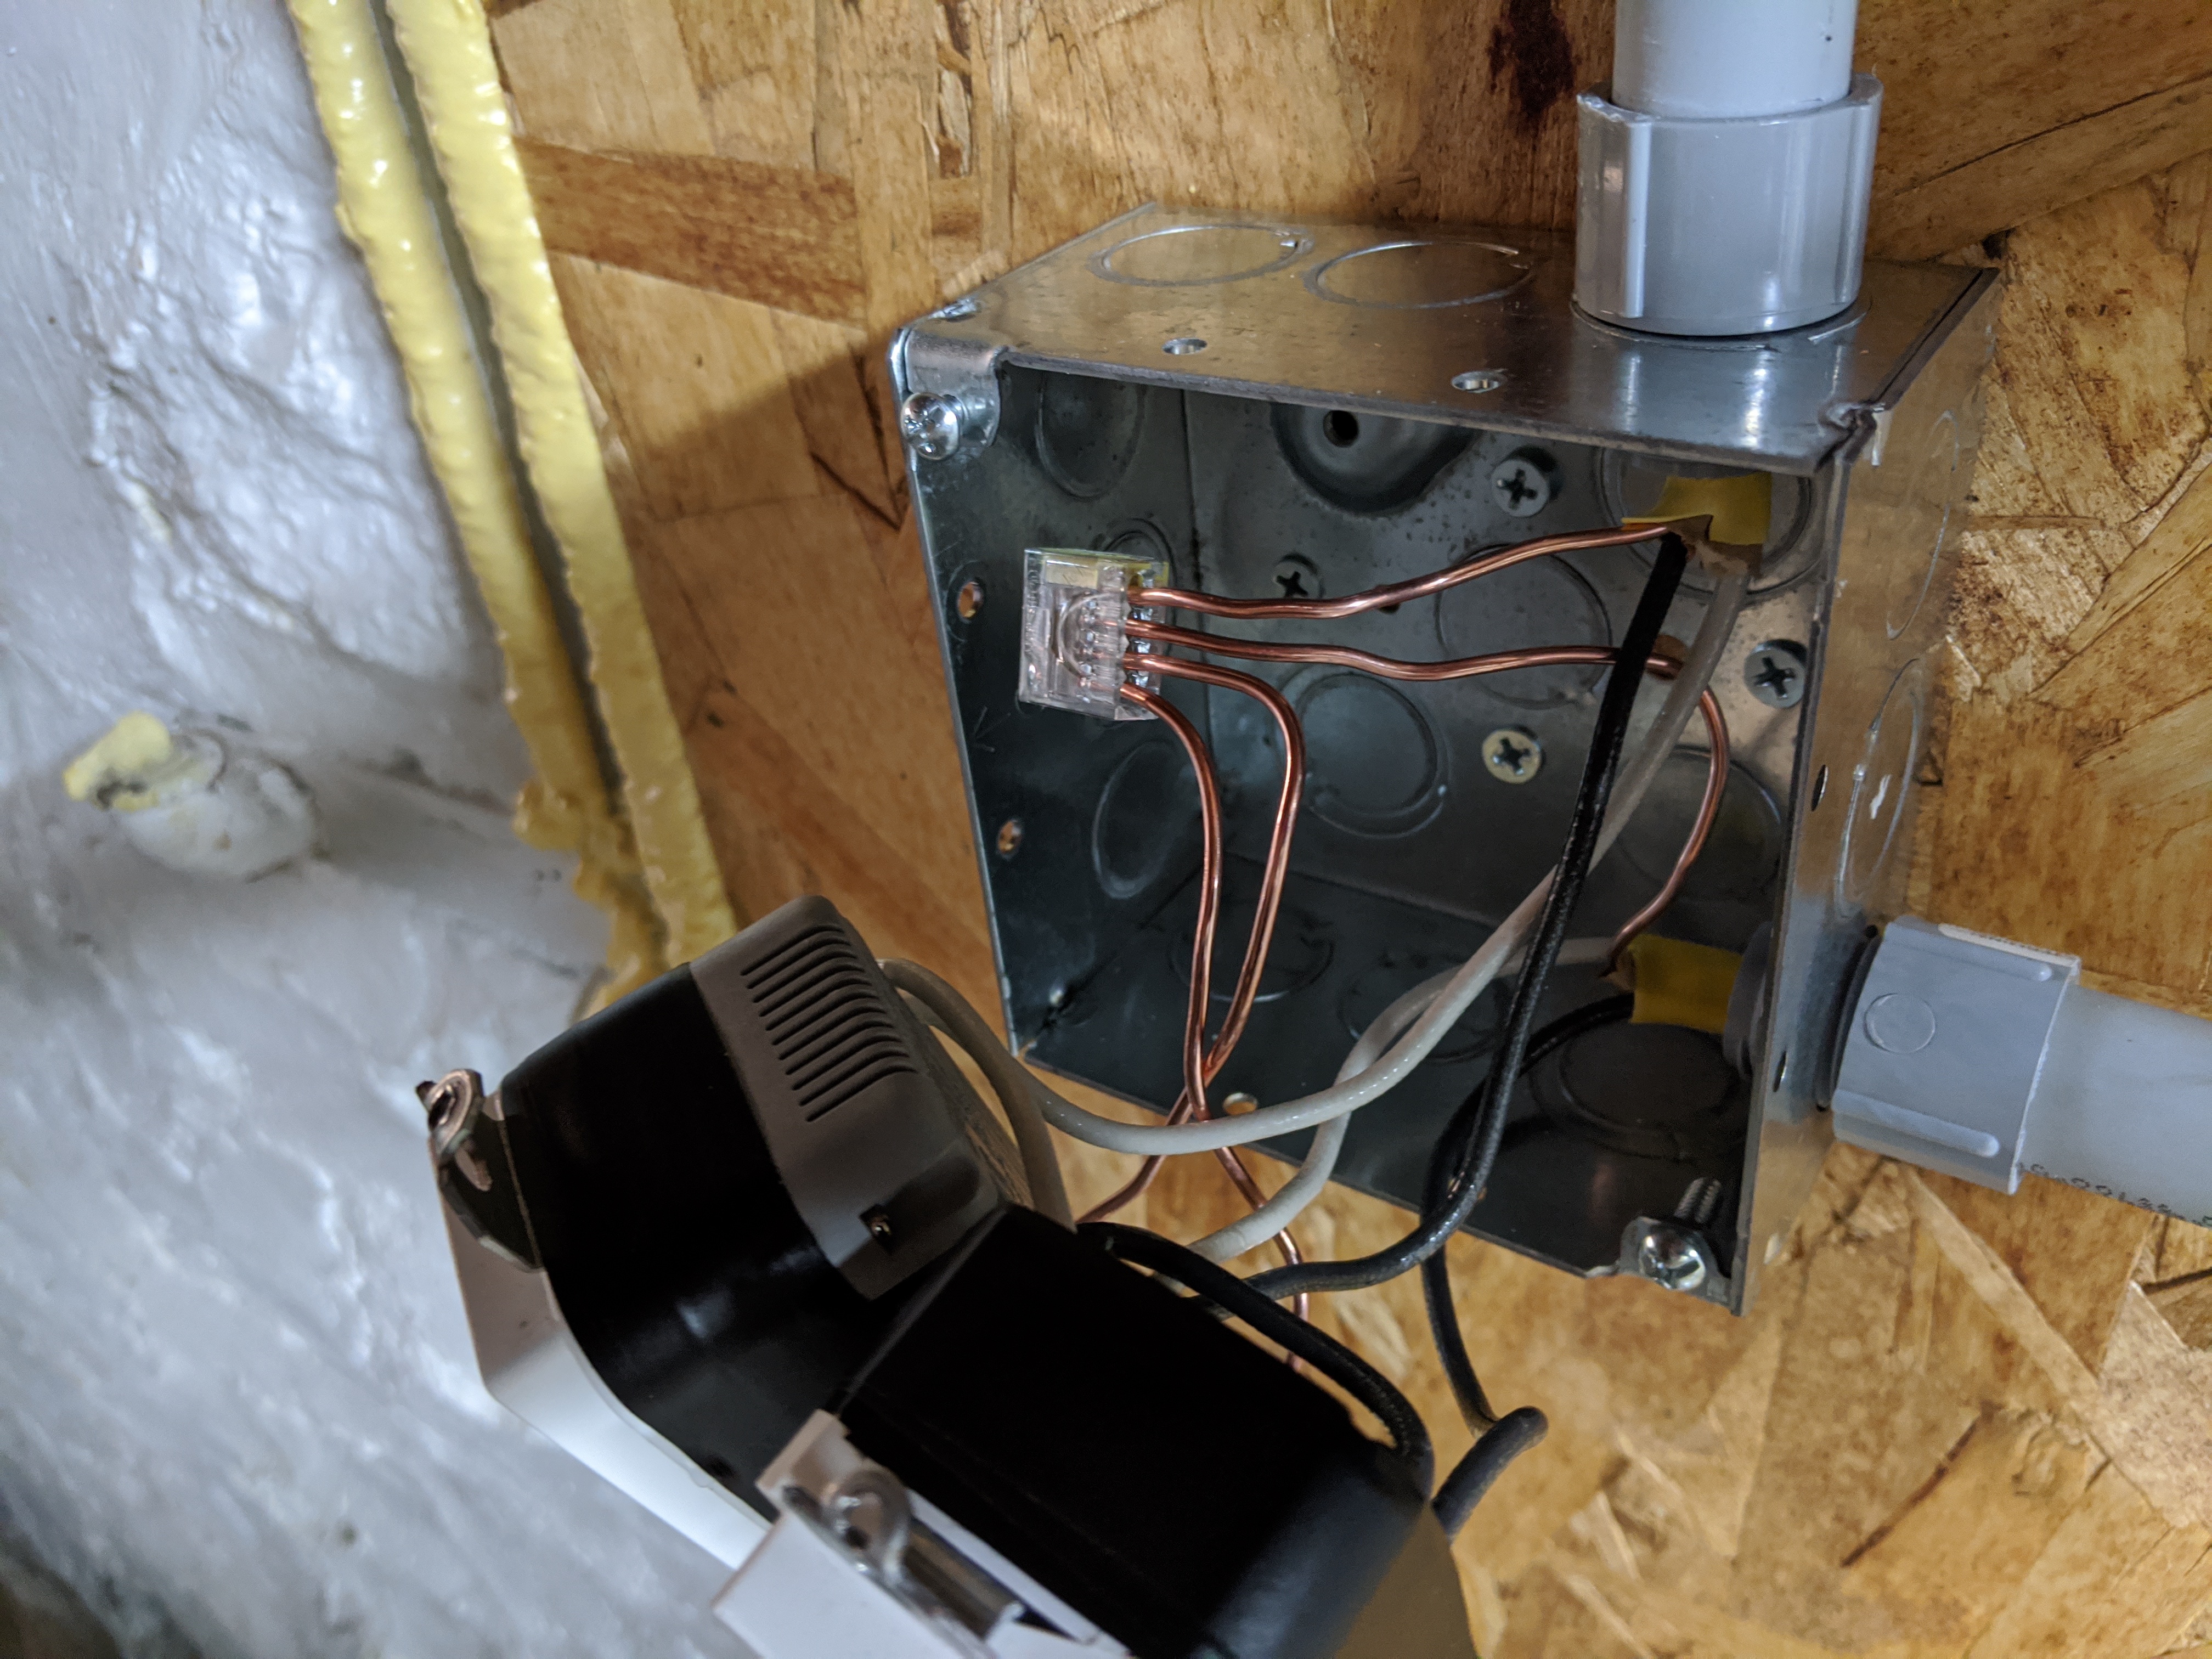
Thanks for the link! I’ve got some projects around the house that need to be looked at (always something in an old house) but when things settle down I’ll loop back around and dig into the Raspberry Pi. The reason why I put an outlet in the Orbit Box with the USB ports was in case I wanted to power the Raspberry Pi via USB. So was kinda looking ahead a bit. That little thing drove me bonkers last year on Home Assistant and I almost kicked it to the curb. Glad I kept it.
Thanks! The biggest challenge was getting the PVC sized correctly and the dual outlet box. Took a couple weekends finding time to sneak down to the basement and several trips to the hardware store.
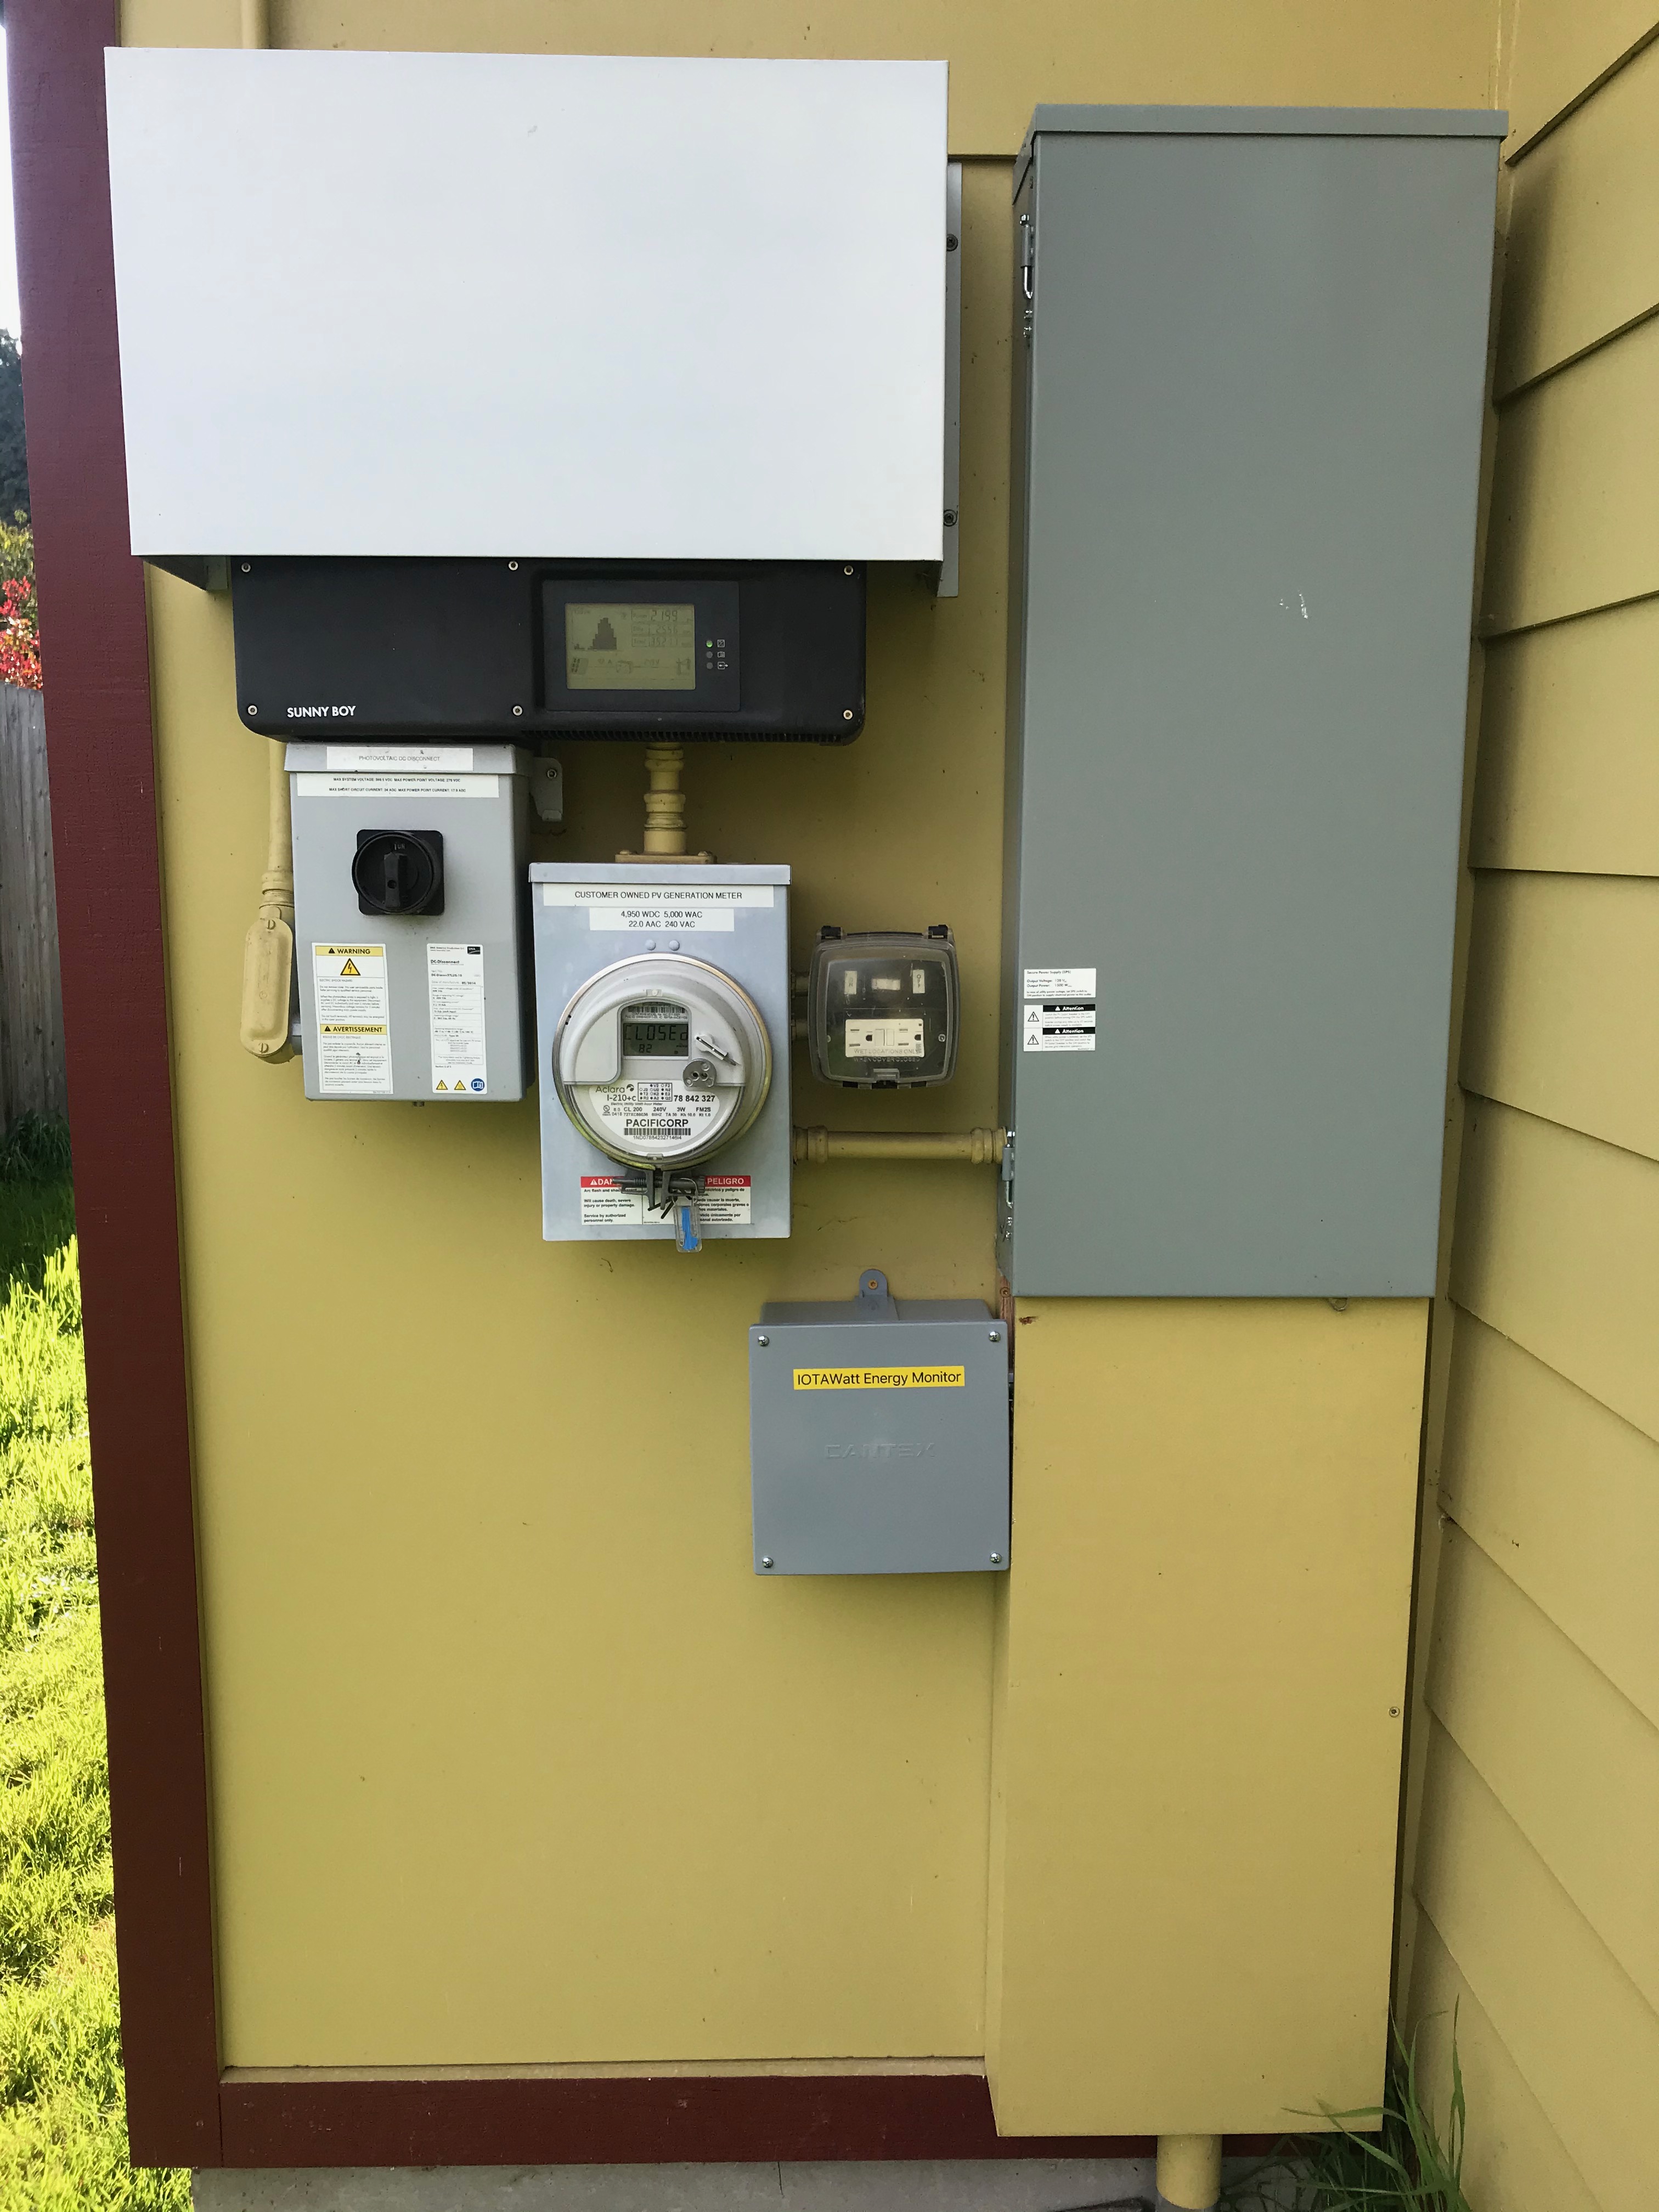
I found the orbit box at home depot, fyi. Orbit box is apparently for a sprinkler system enclosure. I am going to use 3/4" as I have less lines. Hoping they fit. I am buying for Habitat for Humanity home. They always leave extra space in breaker box, thank god.
I would not recommend using that USB port to power the IoTaWatt. It’s a charging port, and doesn’t necessarily have the regulation and low ripple of a power supply.
I also have a Rpi here and am trying to install InfluxDB and Grafana, every month or so I try again. But the Graph+ that’s built in works surprisingly well. Much better and more useful than my Enphase Enlighten web portal.
I wish I had known about the Orbit box with the built in outlets before I installed mine. That’s what I get for not searching the forums first.
That said, the Home Depot 8" x 8" x 4" box with a glued in power outlet box worked well for me.
I do hope to write up the install soon, but for now maybe I can share a few pics in case it helps anyone to get inspired.