I have been running my IoTaWatt for the six months and it has, and remains, flawless. I love this little data gathering device. Today, my single panel 14 CT install just got a bit more complex. I now have to re-design and move many of the CTs between panels to get the various items I want to monitor. Happy to have an IoTaWatt and a new home battery, but sad that I lose so much data while I have to re design and connect nearly everything.
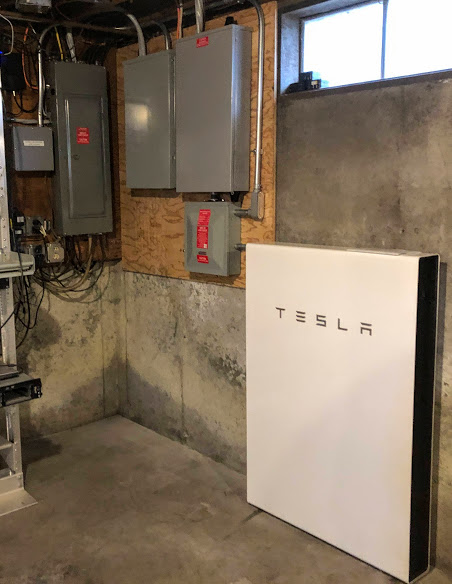
I think it will be time to order some cable extenders and change the location of my monitoring box to the open space in the middle of all the panels. Solar and Battery are in the lower small box on the right, Mains, range, and a few other high load circuits were moved into the center panel while all my old low load circuits are now still in the old panel. Here come the fun.
If it suits you, please share your process in this. I installed my first Powerwall for a client last week and I’d be curious to see your setup closer. Are you going to use the Iotawatt to monitor loads in both your main panel as well as your backup panel? The functionality of having so many inputs on the Iotawatt puts it ahead of so many of the other monitoring hardware available on the market.
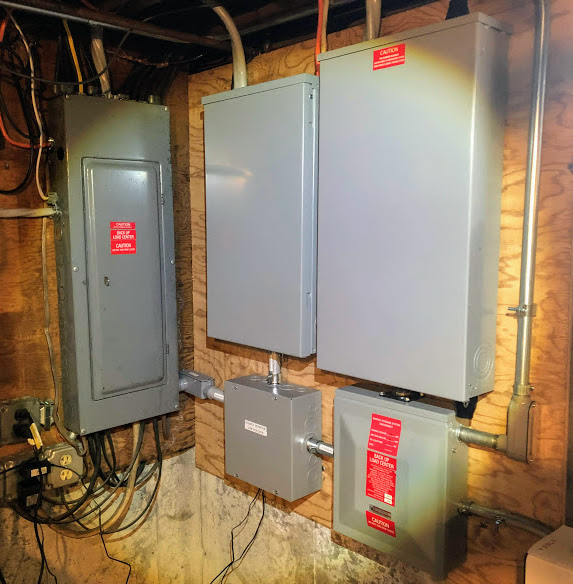
If you take a look at the attached image, you will see a section in the lower left of the new cluster of boxes. Happy to provide any details I can as so many here have also help when I had questions. I do have a fault with the install that required the installer to come back out and replace something in the transfer box. Off behavior, but Tesla admits it is their issue to address.
So, with the previous install, all my CTs were located within the main panel making things easy terminate into the plastic box to the left of the old main panel which housed the IoTaWatt before all the changes happened.
Now with the new design, I plan on dropping a new metal box (https://www.homedepot.com/p/WIEGMANN-NEMA-1-10X10X4-Screw-Cover-Wall-Mount-Carbon-Steel-SC101004RC/100118037?MERCH=REC-_-PIPHorizontal3_rr-_-202067045-_-100118037-_-N) and mounting it in that sweet open area left by the install; below the newer panels. My plan is to connect the mains CT from the box just above where the new box will go, there are also a few large loads the electrician moved in to this new panel to keep them from using the battery when in backup only mode (range, garage doors, etc.). My configuration is a limited home backup solution, so only the necessary loads are powered by the battery (well, heat, lights, etc).
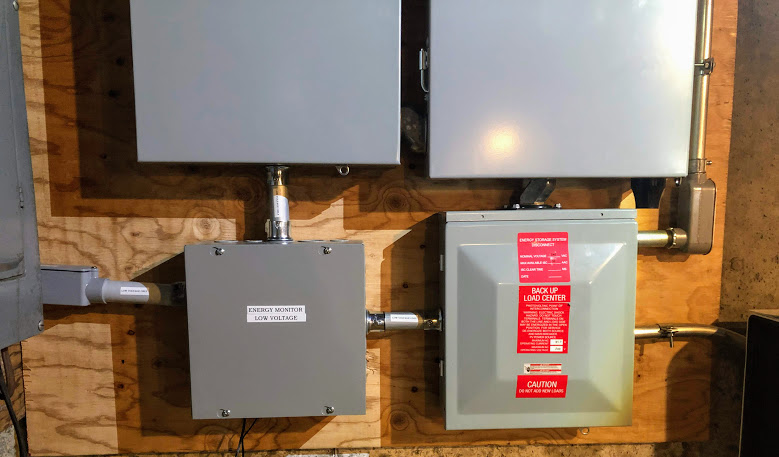
So I will install a 1" conduit and drop the CT cables from that new mains (panel with no red labels) box into the new NEMA one that fits nicely in the new open area. Next, I plan on also connecting the new IoTaWatt metal box via 1" conduit to the box on the right of the open space. In that box, with multiple red labels, is where the solar panels and new battery terminate. I want to monitor the PV panel status and battery flow (neg = charing/pos = discharging) via the IoTaWatt.
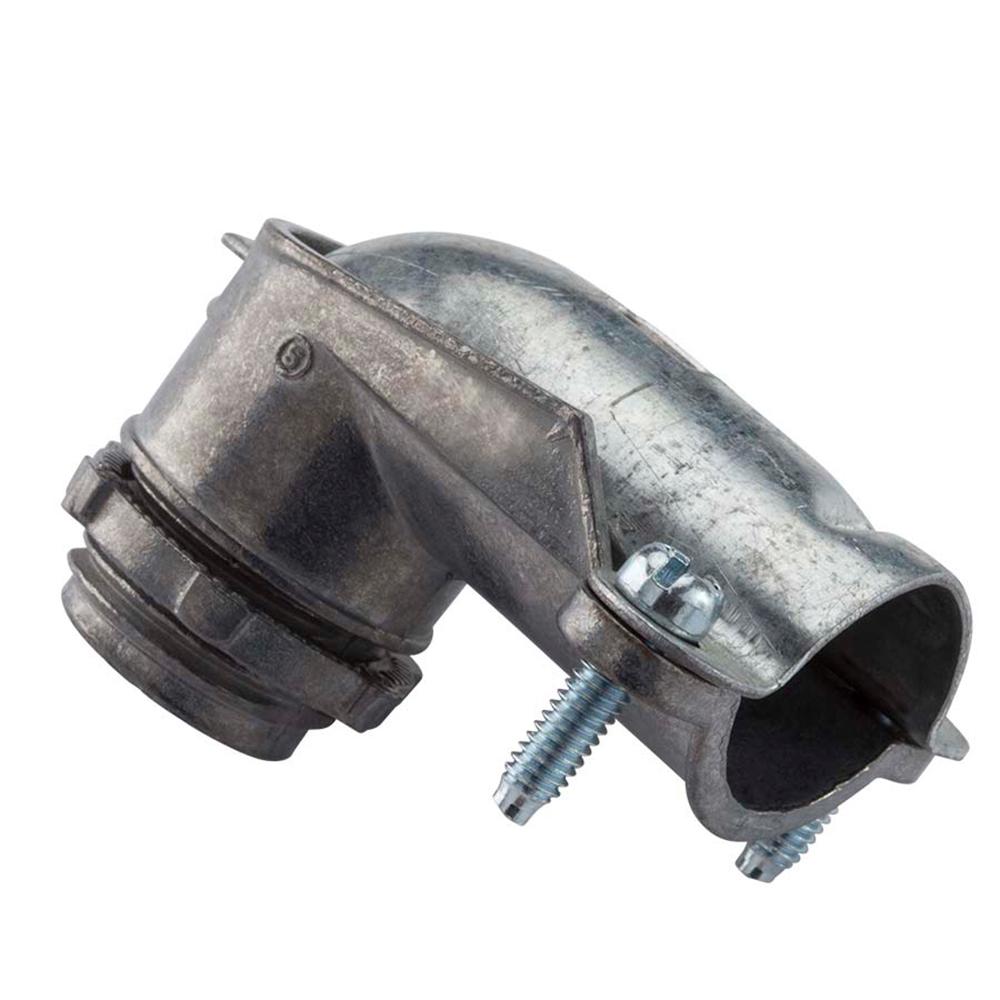
Lastly, I plan on connecting a 90 degree (something like this: https://www.homedepot.com/p/1-in-Flexible-Metal-Conduit-FMC-90-Connectors-11010/100139578) so I can run a conduit from the old box at the bottom of the panel over to the newer IoTaWatt box. That way I can run all the necessary CTs from the various boxes and terminate them all in the single new box. It is nice having the longer CT cables with the items from Overeasy as I will need them from a few runs.
Once they fix the gateway/transfer issue and the inspection is done, I will get to connecting up the IoTaWatt once again. I miss all the great data it provides and cannot wait getting the system going again.
That’s quite a project in its own right. Have you tried putting an ESP8266 in a metal box? I’ve got one inside an old stereo receiver cabinet, and it works OK, but the enclosure has louvers and is thin. It can’t help the WiFi.
Not an expert on the NEC, but I’ve seen some language that CTs are OK inside the load center, but if they exit, must be protected against casual access.
So to me that means that in jurisdictions where that applies, the CT wires should be run behind the mounting board, covered against tampering, or inside conduit.
My take is that conduit can be PVC. I’ve done a fair bit of conduit, and PVC is an order of magnitude easier than steel to install. Cheaper as well.
You may find it more expedient to run some PVC conduit from the new cabinets to the existing IoTaWatt install and just add some headphone extensions to the new CTs.
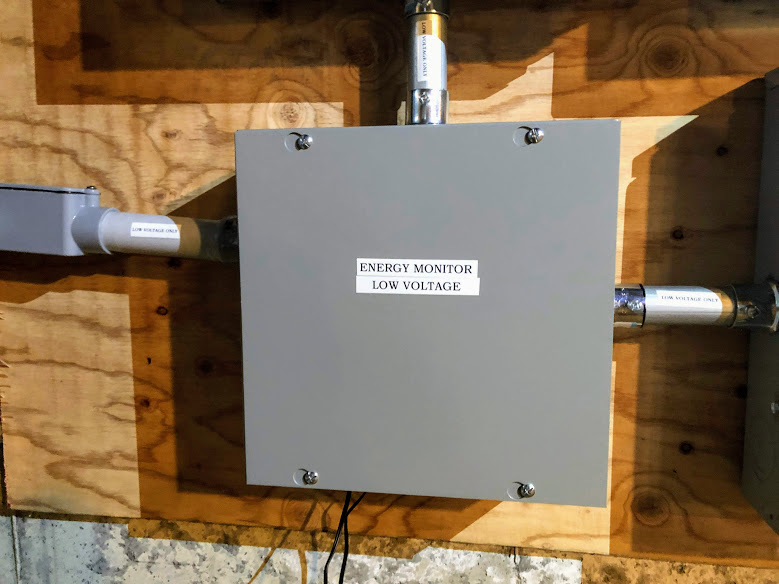
@overeasy I thought through some of this apart from the wireless which the AP is not more than 20 feet from where the box will reside and I have previously had it in a thicker plastic box. I could also leave the cover of the new metal enclosure off to show that wonderful IoTaWatt label mounted like a picture in the center.
I picked up the EMT 1" conduit and the simple screw connectors. Each of the boxed (apart from one) have a 1" knockout close to where the box meets, so mainly straight runs down or to the side; no bends I can see. The only tricky one is the old panel is mounted close to the wall, but there is a knockout on the bottom side.
I had the initial installer of the battery run a 3/4 conduit from the old plastic box to the mains box and was going to fish the CTs though, but each would need an adapter, and I would not be able to easily reach the solar/battery lines without much snaking of wire and connectors that would fill up my small 3/4 existing conduit. It seemed easier to simply mount the new box, mount it drop the wires through nice 1" EMT and off we go getting more info.
Thanks for the thought on the metal box (which I will need to test), but think I have ways around it. Love when others have input that I did not think about.
So, for any interested, here are a few images from this mornings project to get my energy monitoring back up after having a home battery installed. I have been without any monitoring for nearly five days and one realizes how much it is missed when not there.
The below setup took a few trips to Home Depot and Lowes for all the items, but overall I’m happy with how it turned out. I used to have a plastic box on the side of the old main panel, but with the newer panels and moved loads, due to the battery, I had to find a way to make it work.
After I took the attached images, I neatened up the power and reference voltage cables with some wire stables, etc. PVOutput, Emon, and IoTaWatt back functional.
The battery is still down due to an issue with the transfer system, but once that is up and operational I will be able to start to track and figure out how I add this device to the equation of consumption, export, etc.
At this time, they called me today to say that the next appointment would be on the 9th of May… Yep, that long. At least I have data for the home again. The IoTaWatt works well thought the metal box, and if I need to swap it out for a clear plastic one for show, I till can. Now that I am getting data once again, my hands have stopped shaking, I can sleep, and I think start eating again.
It has to be clean for the inspector visit, and I also like to have nice runs as well. That is why I went back with wire staples for the power cords. Labels and all. Once I start to collect info on the battery (charge/discharge) I will let you all know.
@quella Hi - What is your plan on monitoring charge / discharge info? What data point are you looking to measure, Volts, Watts, etc…? Are you planning on leveraging iotawatt device to collect the data or something else?
I have a new iotawatt install and have a solar and battery setup in place. Already the solar side being monitored in how it satisfies our house demand but would also like to monitor the battery side, voltage levels over time.
I’d be interested in your plans since it sounds like we might have a similar setup.
Have a look at the below links to other forum topics which have a few ideas that may answer your question. I use the IoTaWatt to monitor the connection between the inverter and my load center (panel) after power is converted from DC to AC. In my case, a negative flow represents charging or exporting power to the battery and a positive number is my home importing/discharging. I try to look at the battery as a secondary Grid feed which can be negative or positive based on the direction of flow.
Let me know if you have specific questions. Today I grab watts and send that info to both EmonCMS and PVOutput. From there I can calculate kWhs, etc. Happy to assist where I can.