I finally got around to buttoning up my IoTaWatt installation and thought I’d share some pictures and the equipment used.
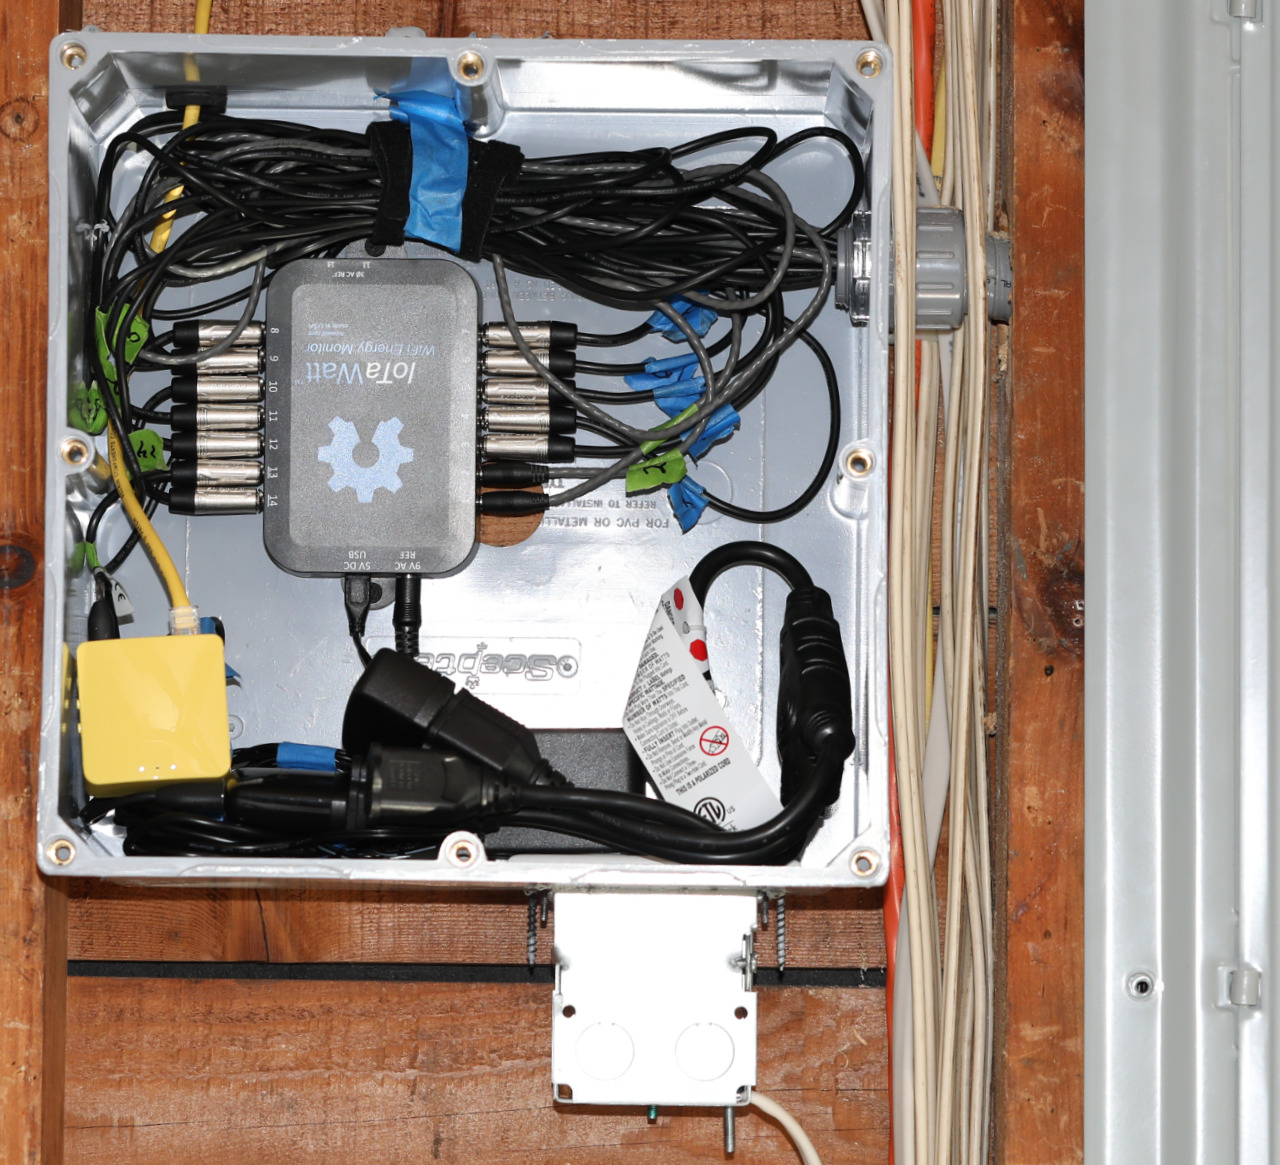
The electrician picked out a really nice box, an outdoor rated, thick PVC Scepter junction box. Definitely overkill here, but I’m very pleased. It has plenty of room in there for everything and seals up incredibly well.
I’m using a small wireless mini-router because the location of the panel is sufficiently far away from my main wireless access point that the performance was spotty. Having this little thing in there, hardwired to my network, made a huge difference.
I also found this 3:1 short extension cord which made arranging the power cables and USB adapters much easier than those fixed plug expanders that are so very common.
Unfortunately (sorry @overeasy !) I chose to mount the IoTaWatt upside down, because the junction box is mounted at about six feet high, so I wanted to be able to easily see the status lights near the 9V reference and 5V power without getting a ladder out.
There are a few small things I would do differently, mostly due to my OCD tendencies: I would have made sure the electrician mounted the junction box right-side-up. ![]() And I would have had him put the metal electrical outlet box inside the junction box, instead of sticking out the bottom, to minimize the hole sizes. Again, not really a concern for an indoor install.
And I would have had him put the metal electrical outlet box inside the junction box, instead of sticking out the bottom, to minimize the hole sizes. Again, not really a concern for an indoor install.
Someday I’ll get some pro-grade wire labels to replace the blue and green painters tape with the port numbers on them. I suppose now that everything is done, I could take them off…
One very small suggestion for improvement of the IoTaWatt in potential future versions: the hole in the mounting tab on the “top” (bottom in the photo) is partially inaccessible with the 5V USB power inserted. If one were moved just slightly, I could have mounted the IoTaWatt without having to power it down. (Everything was just dangling around in there until I put the 3:1 power adapter in place and drilled a hole for the ethernet cable, the last pieces I did today.)
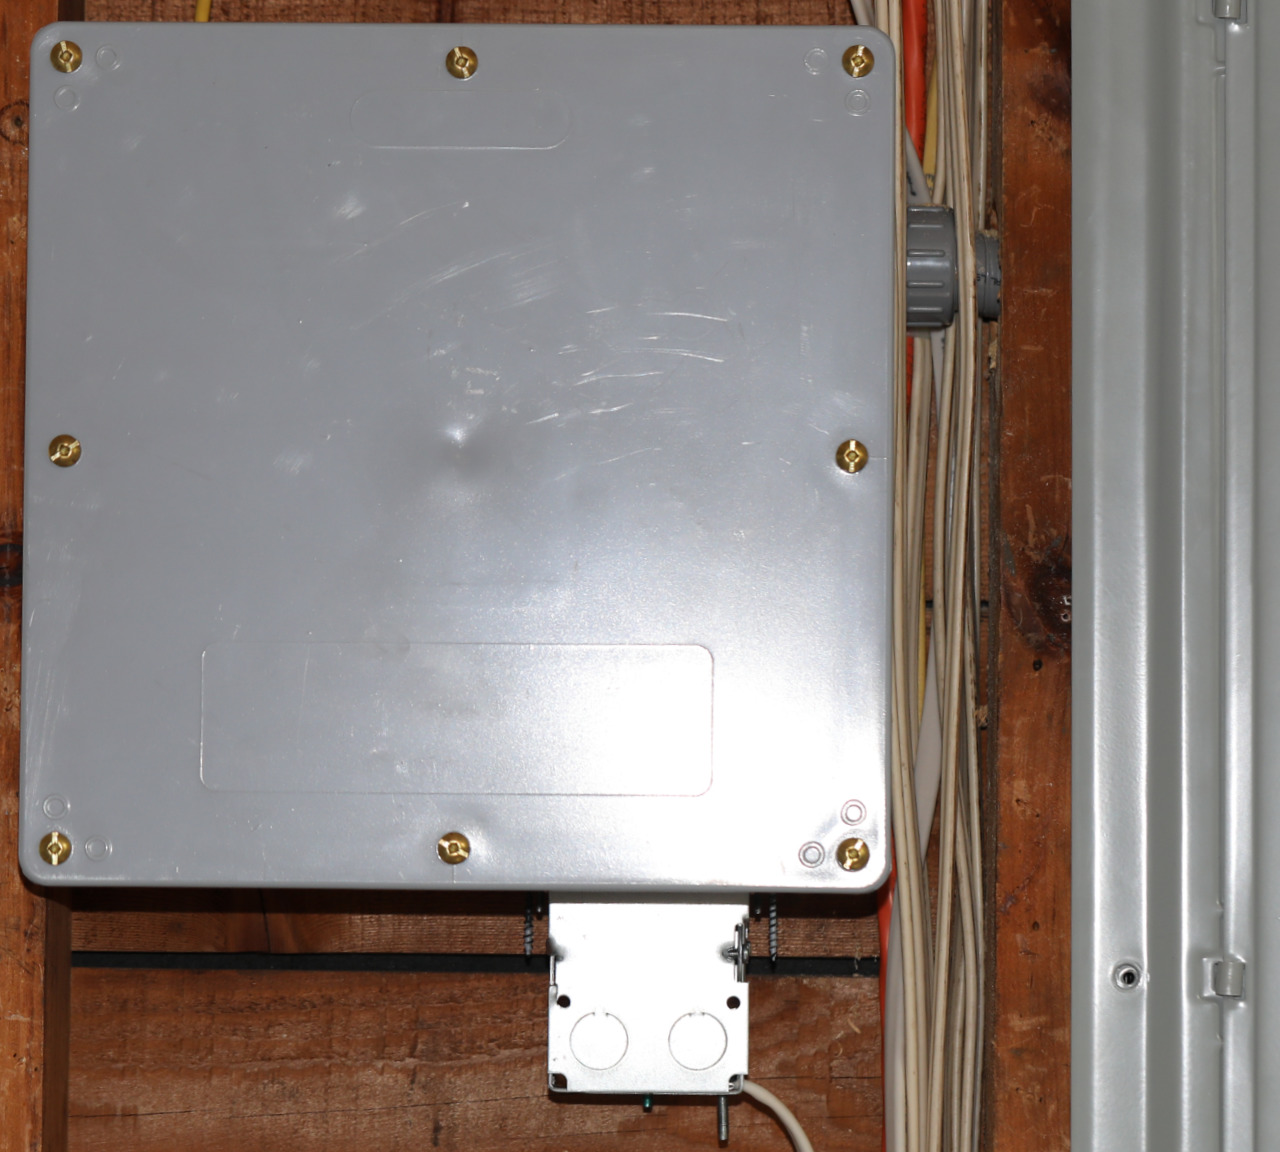
Anyway, with the cover on, it’s definitely looking like a pro install. Now, if only there were IoTaWatt stickers available to plaster one on the junction box… ![]() I’ll probably print out something from the website and tape it on there eventually.
I’ll probably print out something from the website and tape it on there eventually.
Bill of Materials:
IoTaWatt V5 North American bundle (maxed out with 14 CTs):
https://stuff.iotawatt.com/product/north-america-bundle-120v-split-phase/
Scepter Junction Box 12"x12"x6"
GL-iNet GL-MT300N-V2 mini router “Mango”
DEWENWILS 18 Inch 1 to 3 Extension Cord Splitter Cable, 16AWG Heavy Duty SJTW Wire, 3 Prong Indoor Power Strip Liberator Outlet Saver, ETL Listed, Black, Pack of 3
